|
|
||||||
|
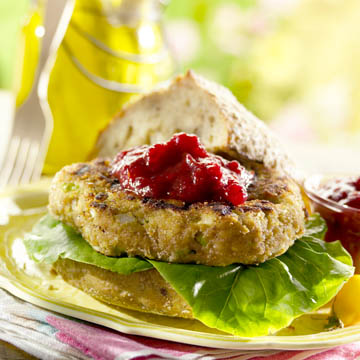
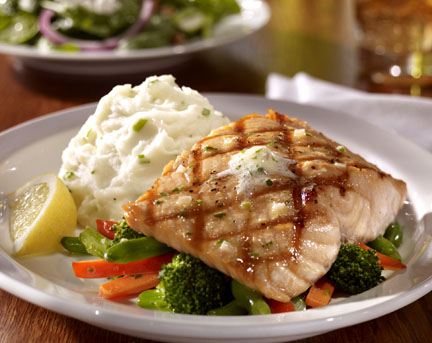
Return to the Food Photography Blog Visit Professional Visit the food Photo books can capture the memory of your favorite food.
|
|||||
|
|
||||||
|
||||||
|
|
||||||
|
 |
|||||
|
|
||||||
|
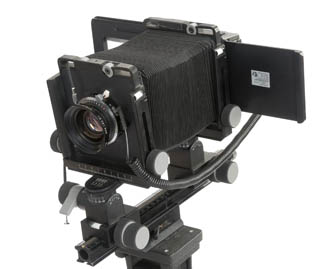
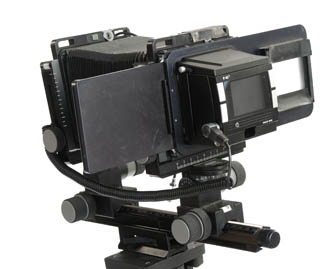
The ideal food blog camera has interchangeable lenses, with macro, manual exposure, and manual focus capabilities. |
One downside to cropping in the computer is that you loose some image quality by throwing away some of your camera chip’s information. This usually isn’t a real bid deal because your blog / web site doesn’t really need all that big of a file (which is 72 dpi resolution). If you wanted to make a print or to publish the picture in a in a magazine (which needs 300 dpi resolution) you might see a quality reduction, but will probably holdup just fine for your food blog. So don’t sweat it if your camera won’t focus as closely as you’d like. You can always crop it later. Like I said earlier, there are some subtle differences between an image cropped in-camera and an image cropped in-computer, but if your camera can’t get it close enough, then you can still shoot food. Don’t sweat it. There is one thing I should mention about using computer software to crop your picture instead of using the camera… The farther away from the subject the camera is, assuming the same lens is being used, the more the depth-of-field will increase. So if you’re attempting to get the least focus possible, then moving in closer will give you less focus than if you were farther away and then cropped in using a computer software. Understand? Manual Focus for food blog photographyManual focus is another useful quality in a camera for food photography. Having the ability to focus the camera where you want to, gives you a little more creative freedom when it comes to food photography. It’s a tool professional food photographers use to emphasize the part of the plate that they’re trying to highlight. If you’re talking about the main dish in your food blog, you can focus on the target food item and let the side dishes go a little soft (out of focus). The ability to focus exactly where you want to, is a great tool to have in your food photography arsenal. |
|||||
Manual Exposure for food blog photographyManual exposure is yet another great capability for a food photography blog camera. Sure, this capability comes in handy for getting the exposure correct, but a more useful characteristic of manual exposure is having the ability to control the aperture. The camera’s aperture controls the depth-of-field, or the amount of “focus” in your picture. In food photography, often the less focus you have, the prettier your pictures is. Of course, there are times when minimum focus is a bad thing, but what’s nice about manual focus on a camera? You have a choice. That choice is another creative tool at your disposal. Just so you know, 90% of my food photography uses the maximum aperture and therefore the minimum focus possible. Must you have a camera with manual exposure? No. Is it more flexible to have a camera that does have manual exposure? Yes. |
|
|||||
|
|
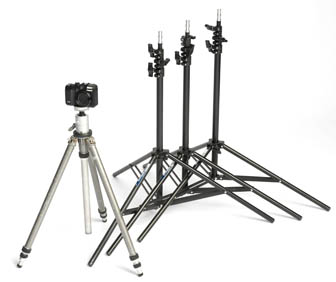
Lighting equipment for food photography and food blogsFor the purpose of this article, I went out to the hardware store and picked out a few items that you could use to improve your food photography. I wanted to show you what it would take to put together a “budget” food photography lighting kit. Light stands & Tripods for food blog photographyThere are certain items of photography equipment that I wasn’t able to replicate at the hardware store. I would recommend that you get a tripod, and three light stands at some type of camera store or on the Internet somewhere. They don’t have to be really fancy, just something to hold your camera and lighting stuff. If you can figure out a substitute for these items, then go for it. I just couldn’t think of anything that would do the jobs that need to be done. If you have any suggestions of every-day items that fulfill these functions, please email me with your ideas and if I think the ideas are good, I’ll include them in this article. |
|||||
Why use a tripod for food photography for food blog photography?When you “do” food photography, you end up “building” a picture and not “taking a picture. At least that’s what professionals do, and I’m assuming (you know what they same about that) that you want to make your food photos more “professional” looking. By “building a photo”, I mean that food photos are refined step by step. First you set the camera up and take a picture. Is it camera angle too high or too low? Change it, depending on the answer. If the camera is being hand-held, you’ll never be able to get the camera exactly back where it was a second ago, so you’ll be starting almost from scratch on every photo. You’re going to be moving lights, props, and a bunch of other things and you’ll be making decisions all based on an exact camera angle. One inch to the left, and you have yourself a totally different picture. Trust me, get a tripod. At the end of the shoot if you want to, go ahead and take the camera off the tripod and shoot the set from a bunch of different angles, but you’ll already know you have a good shot in the bank. |
 |
|||||
Sometimes these free-form shots at the end will prove to be better than the ones that you created by refining the picture step by step, but rarely. If nothing else, the refining process will help you learn what you do and do not like in your food blog photos. You’ll become a better food photographer if you use a tripod. It’s that simple.
Main light for food blog photographyIf you want to improve your food photography, you’ll need to control the light that’s illuminating the food. To do that, you can either manipulate the available lightin, which we’ll talk about later, of you’ll need to add your own light. I bought two simple lights that you can find at any hardware store. (or online) They’re nothing fancy. They cost about $12.00 each, maybe less, I can’t really remember… :+) What’s nice about these cheapo lights is that when you’re not shooting food, you can always use them in the garage or attic. If they get a little banged up, no big deal. Another good thing about this type of light is that you can get a variety of inexpensive light bulbs to fit them. |
|
Care to join our |
||||
|
I would suggest that you get 60 watt and 100-watt bulbs to fit both lights. There may be times when a little more or a little less light will prove useful and it’s good to have different wattage bulbs on hand. Bed sheets for food blog photographyIn order to make the shadows created by your lights a little softer, you’ll need some type of white surface to bounce light off of. I suggest that you get a hold of a couple of old bed sheets. It’s important that the sheets are white and not off-white or any other color. You’ll want to bounce “White” light back into the food, not tan or maroon light. Checks and paisleys are out too. :+) Dowel rods for food blog photographyFor about $2.50 each, you can pick up dowel rods at the hardware store. Buy a couple. You can attach a dowel rod to a light stand and then hang the bed sheet over the rod so that it creates a large area for the light to bounce off of. This is especially useful for creating a nice shadow less fill light for you food blog photos. |
 |
|||||
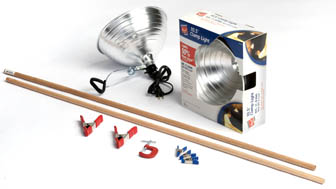 These are the lights and items I picked up at the hardware store. With these items, you should be able to create some beautiful food photography for your food blog. Why 2 dowel rods? How are the kids going to sword fight with just one...? |
A-clamps and small C-clamps for food blog photographyI use these items to attack the dowel rods to the to the light stands. You might be able to come up with another way to make this work, but while I was standing in the isle at the hardware store trying to figure this stuff out, this is what I came up with… My professional equipment really comes in handy here, but it’s probably out of your price range too. If you’re interested in seeing what I use for this function, look here. Shooting surfaces for food blog photographyWhat do I mean by shooting surfaces and tabletops? If you are going to be shooting a lot of food for you food blog, you probably would like some of the images to be different from the others you’ve shot. The hardware store has all kinds of surfaces to shoot on. You can buy different types of wood planks, corkboard, tiles, Formica patterns, materials, you name it… Or you could just stick to your kitchen or dining room table. Just an idea… |
|||||
Lens shades for food blog photographyThis may seem minor, but I’m soon going to suggest that you place the light facing into your camera from the rear of the plate. When you do this you’ll need something to keep the light from going into the lens of your camera. If you don’t, the light will probably degrade the quality of your picture a little or even a lot. All you need is some type of opaque object that prevents the light from get into the lens of your camera. The lens shade doesn’t necessarily need to be attached to your camera lens either. I usually use a flag, but you can use pretty much anything, even your hand will work. |
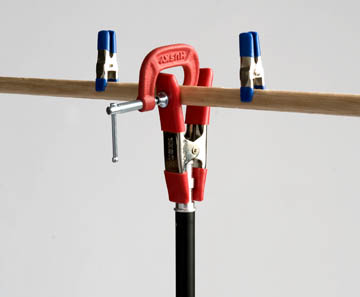 |
This is how you rig the clamps so that you can drape your bed sheet over the dowel and use this setup for a large bounce surface for your fill light. The blue clams are so that you can attach the sheet to the dowel. | ||||
|
|
||||||
|
Care to join our mailing list? Return to the Food Photography Blog Didn't find what you were looking for? .© Michael Ray 2009 |
||||||