|
Digital Food Photography Tips (page 1) Food Photography Portfolio - Food Photography Blog - Professional Photography 101
Digital Food Photography Tips (6-12)Digital food photography tips from a professional digital food photographer (page 2) |
|||||
|
|
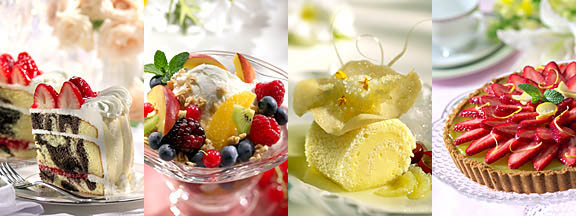
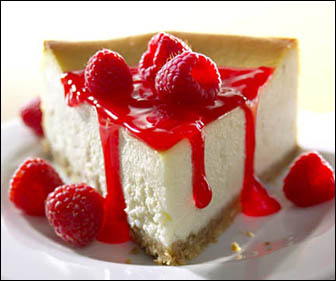
These “digital food photography tips” are a continuation of an earlier post entitled digital food photography tips (page #1). These tips are meant to help novice food photographers and food blog photographers. If you are interested in learning more about digital food photography, you might want to visit my food photography how-to site, the food photography blog. There, you can find numerous articles on the subject of food photography, some written for new-bees and others written from professional photographers. If you'd like to see more food photos by the author, please visit his web site and look around. If you have even more time to kill and you'd like to read more about being a professional photographer, you can visit his other how-to web site, Professional Photography 101.com. |
||||
Digital Food Photography Tip #6 - Light a stand-in if possibleMany novice digital food photographers are under the impression that food has to be shot within seconds of it landing on the set. The reality is that most food will last longer on set than most people think. It may last as long as a half hour, depending on the particular food, but that doesn’t mean that it’s going to look any better the longer it’s on the set, so it’s always a good idea to shoot the final shot as soon as possible. One way to insure that the food is photographed as quickly as possible is to make sure that the food is lit as well as possible, before it arrives. The only way to do this is to begin the lighting by using a “stand-in”. |
 |
||||
|
When doing a digital food photography shoot, much attention is given to selecting the best available food item. For example, if we’re shooting chicken breasts, the stylist will by several packages of chicken and when the packages are opened at the studio, each breast will be laid out and examined for size and shape. The best piece of chicken will be selected as the “Hero” and that piece will be given the most attention of the food stylist. More than likely, all the chicken will end up being cooked, just in case the cooking process changes everyone’s opinion about which is the Hero. One piece may start out as a hero, but that opinion my chance because of how it’s cooked. The “stand-in” is usually a piece of food that looks similar is size and shape to the expected hero piece. The hero food will need in the kitchen to be tweaked by the food stylist, so the stand-in (or reject) food will be available for lighting. Ideally, you’ll want to select a stand-in that is as similar as possible to the hero piece. Since you’ll be making lighting decisions on the stand-in, it’s important that it is as much like the hero as possible. If the pieces are of vastly different sizes, shapes, or textures, the lighting may work for one, but not for the other. This means that the height of the food, the shape of the food, and the “shininess” of the two foods must be as similar as possible. If you’re shooting pancakes and the hero will have syrup, then the stand-in should have syrup too. If the hero burger (chicken, pork, or whatever) is going to be four inches tall then the stand-in burger should be that tall too. I always mention to the stylist that “I can’t light what’s not there”, and if she wants the food to be well lit, then I must have a quality stand-in. If, for some reason you can’t have a stylist provide you with a stand-in, you can only guess what the lighting needs to be and then when the hero does arrive on set, chances are good that the lighting will need some major over-hall, chewing up time that allows the quality and freshness of the food to deteriorate. |
|||||
|
|
Digital Food Photography Tip #7 - Light from either 10:00 or 2:00Even though I place the main light exactly where I think it needs to be depending on the specific shape of the individual food on the plate, a good starting point for light placement is either 10:00 or 2:00 (if the set is clock face and the camera is at 6:00). Nine times out of ten, this main light placement will work out as a good starting point, and seldom is the final placement more than a few “minutes” from 10:00 or 2:00. If you place the main light closer to 9:00 or 3:00, you end up with less shape than you could achieve with the main light coming more from farther behind the subject. |
||||
| Lighting for food photography is all about giving the food the maximum shape and texture possible, and where you place the main light, will determine just how much shape and texture you end up with.
If you place the light too far forward, everything seems to flatten out, but if you place the light too far to the rear, you end up with glare and reflections in places you may not want them. This glare will eventually appear on the flat surfaces of your food or your plate and will be distracting. Even before you see the first signs of glare on flat surfaces, you’ll see reflections on the rounded corners of the food. Sometimes these reflections on the corners of food and props, will appear distracting, but sometimes these reflections are good things, giving a little life to the photo. You’ll have to be the best judge of that. |
|||||
Digital Food Photography Tip #8 - Scrape the lightPlacing the light so that it scrapes along a food’s front surface, gives that surface the most texture possible. “Scrapping the light” means placing the light so that it is lighting a food surface just enough to enhance its texture. If you place the light so that it is too far forward (toward the camera), the texture is not emphasized enough, and if you place to light too far to the side, there isn’t enough light to illuminate the surface. I’m always amazed that the movement of the light only an inch or two, one way or another, can make a huge difference. Digital Food Photography Tip #9 - Keep the main light source lowMost novice digital food photographers place their main light source too high. Sure, God made the sun and the sun is usually above us, right? That is correct, but think of all the beautiful landscape photos you’ve ever seen… How many of those were shot at noon? I bet the answer to that question is “zero”. Landscape lighting and food photography lighting have in common that they are all about shape and texture. With a great landscape photo, the sun scrapes across the photo showing all the hills and valleys by emphasizing the highlight and shadow sides or every object in the shot. The same is true with food photography. If you place your main light too high, you won’t be “scrapping the light” to achieve the maximize shape possible. Also you’ll be giving too much light to any unimportant horizontal surface, like the tablecloth, for example. Think about it… The tablecloth is flat on the surface of the table. To show the texture of the stitching of the material, you’ll need to keep the light as low as possible. The same is true of any horizontal surface, like pancakes or stake. A low main light position is usually a good idea. Another unrelated reason to use a low light source is because it tends to hide shadows. On first examination, just the opposite seems to be true. The higher you place the main light, the shorter the shadows will be, that’s true. Unfortunately, shadows are what make texture and if you minimize the shadows, you minimize the texture. The funny thing I’ve found out about the length of shadows is that there is a point where they get to be so long, they appear less objectionable or even less noticeable than they were when they were shorter. “Really long” shadows are usually better than ones that are just “long”. (if you can understand that…) As you experiment with this idea, you’ll need to take a shot and then walk away. Come back in a couple of minutes and look at the different lengths of shadows. If you just sit there and gradually lengthen the shadows, they may appear to be getting more and more noticeable as they lengthen, but I think it’s one of those things that you need to get away from and look at with a new perspective. There’s a point where it gets to be so bad that you don’t even notice it any more… I know it sounds weird, but that’s the way it is… Try it an you’ll see. Digital Food Photography Tip # 10 - Light with the fill offIf you use artificial light for your food photography, you probably understand the concepts of “main light” and “fill light”. The main light is the light that gives the shape and texture to a shot and the fill light is the light that lightens the shadow areas of your photo. The more fill light you add, the lighter the shadows and the “flatter” the shot appears. There is a point where the shadows can be lightened to much so that the shot is too flat, so it’s important to add just the right amount fill light. One great digital food photography tip I can give you is to do all your lighting with the fill light turned off. Just use the main light. If the fill light is turned on, you can’t see as well what the main light is doing. It takes some time to get used to working with the fill light off because all your shadows will be much too dark, but the advantage is you’ll be able to better see what your main light is doing. Of course you’ll need to add fill light after you place your main light, but in the time, you’ll be able to see what you’re doing. By shooting more light ratios than you think you’ll like, you can go back to the computer and toggle between all the light ratios you’re shot and select the one you like best. Sometimes, unless you can see options, you won’t realize which ration is the best one. Digital Food Photography Tip #11 - Add fill light slowlyOnce you get the main light doing what you want it to, then you can gradually add more and more fill light until the final light ratio is achieved for your digital food shot. I usually add the fill light after I’m done with placing the main light, and I do it in one-stop increments until I’m sure that I’ve gone to far. Then I go back and look at all the shots where I’ve added fill light and choose the one that I think looks best. If you try this food photography lighting technique, you see that your photos look better and better. Digital Food Photography Tip # 12 Add back light with mirrorsWhenever I light for digital food photography, I like to use a main light, and fill light, and a few mirrors to add texture and edges where I think I need them. I like to use mirrors instead of another light because they allow me to place pools of light exactly where I want them without illuminating the entire set. On almost every shot, I’ll add a mirror from behind the subject, on the shadow side, and sort of rim light the food. This helps in several ways… First, it seems to give a little life to the shadow areas by illumination the edges of the food (in shadow). Another thing it usually does is to enhance the translucency of any food that’s relatively thin, like lettuce of any green garnish. This adds a lot to the overall appearance of the food, and it’s something you should definitely try this. One thing you need to keep an eye on though, when you add mirrors, is that they will cast a shadow and sometimes these cast shadows will be objectionable. The key here is to use mirrors of just the right size and keep them as low as possible. Of course, they need to be high enough to light what they needs to be lit, but when I doubt, the lower the mirrors are, the better. It’s always a battle to add mirrors and yet hide the shadows, but it’s one worth fighting, because the mirrors really help with the overall look of your digital food photography. |
|||||
|
Okay, I’ll stop here for now. I have a few more digital food photography tips I need to work on, so I’ll add more information soon. Again, please forgive any typos that make it through the editing process. I like to write, but I hate to proofread. And my apologies go out to all my grade school grammar teachers, who are now probably rolling in their graves… :+) |
|||||
|
|
|||||