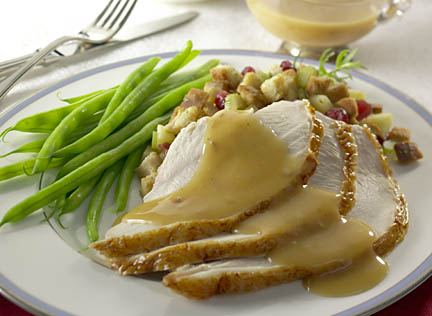
They will do whatever they can to make the shot look as “environmental” as possible and still there are times when something just doesn’t look just quite right. Objectively looking at the picture will produce few overt clews as to whether the picture was shot on location or in the studio, but to the trained eye and to most people’s subconscious mind, the shot just doesn’t seem real.One of the biggest differences between “real” environments and the studio is that in the studio, everything is added to the shot and on location things are usually eliminated from the shot. On location, there may be a window off to the side of the table and in the studio, there may not even be a window. On location, the ceiling is probably five feet above the set and in the studio, the ceiling might be fifteen feet from the set. In the studio, the nearest table might be twenty feet away while on location, the table next to you may only be inches away. All these objects reflect light. Sure, most of these reflections end up being very small, but they’re there. Instead of being just a deep rich colored area of gravy in the studio, on location the same gravy would have a slight glare from the ceiling overhead or the white wall behind it. Which one is better? It all depends on what you want, or more likely, what you client wants. The gravy manufacturer would probably like the dark rich colored shot, but the magazine editor would probably prefer the slight glare and the more “natural” look.
Another thing that affects the number of reflections in a shot is the way a food photographer prefers to light their subjects. Many photographers prefer to use light boxes placed relatively close to the subject. This method of lighting usually eliminates much of the light from bouncing around the studio and therefore from lighting various things around the studio that might end up reflecting into the food subject.
The use of strobe light also affects the amount of reflections in a photograph. When a food photographers uses strobe light, they usually dial up the power and dial down the shutter speed. The whole idea is to overpower the existing light and to create the lighting that they think best displays the food. When a photographer overpowers the ambient light, they eliminate the light on the various objects and light sources in the environment that cause the miscellaneous reflections we are discussing.
Like I mentioned earlier, these reflections are not necessarily good or bad things. Each reflection has its affect on the photograph. Some reflections add to the photo and some reflections detract. Not all viewers will agree on which reflection does what…
Bad Reflections in studio lighting
Again, I might like a reflection and you may not. I may generalize a little here, so keep in mind that what I’m about to write is subjective opinion, and you may totally disagree. Usually, a reflection from the dominant, or main light, is not a good thing. The reflection from the mail light is usually so bright that the highlight that it creates ends up being much “acute” in nature. These highlights end up being totally burnt out, with no tone to them what’s so ever. I often times select the placement of the main light specifically to avoid these acute highlights. Food items with rounded surfaces tend to be the most difficult to light without these “too bright” highlights. These types of highlights can sometimes be hidden by selecting the precise angle where the corners of the food minimize the reflections. Most of the time, you will just have to experiment with the placement of the main light to give the needed shape to the food while at the same time minimizing any unwanted glare you might create. The placement of the main light is often taken for granted by novice food photographers. Professionals know that the EXACT placement of the main light is one of the most important aspects of good food photography. Even an inch to one side or another, or an inch higher or lower, can make a huge difference in the final photographic results.
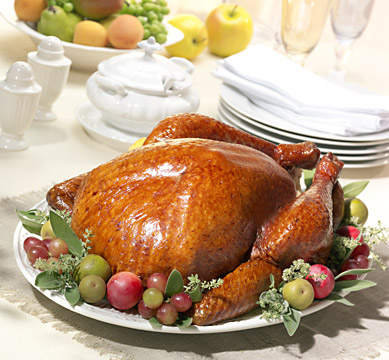
Other bad reflections are the ones that are so bright that they obscure the color of the food beneath them. Manufacturers are usually very picky about the color of their product. They want to see as much color as possible.
Good Highlights in studio photography
When lighting, a good professional photographer will select the placement of the main light to enhance the texture of the food, while keeping an eye on the reflections created in the process. Once the exact angle for the main light is selected, the photographer will determine the correct amount of fill light and then where any additional light is needed. The additional light might be provided in the form of a reflector, another light source, or even a mirror. I use all the above, often times in the same shot. One of my favorite glare creators is a piece of foam core, or other large white surface. I like to use 4x8 foot sheets of foam core.
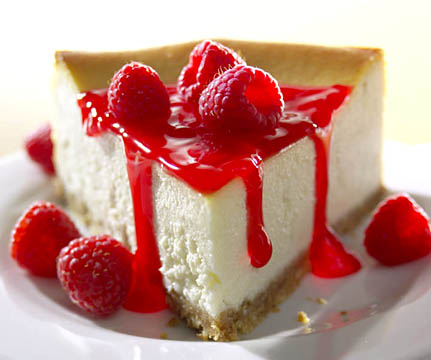
The way, I set them on the floor and lean them against the table where I need them. That size is big enough that they can cover a relatively large surface area reflection needed by some reflective food elements such as gravy, syrup, or even soup. One of the keys to getting a good glare on something is to be able to control just how bright the highlight gets. That means you need to control how much light hits that foam core. The best way to do that is to light it separately. Keep the main light off the reflector as much as possible and add another light just to illuminate the reflector. This allows you to not only control the intensity of the reflections, but it also allows you to control the graduation of the highlight. If you use a spotlight to light the reflector, you can put the hot spot of the light in one area and then let the other portion of the reflector to get less light. This smooth graduation of light will give you a very nice effect on any shiny food item, and also on any plate that your food is sitting on. You will have to look to see what you are getting every time the light is moved. It’s best if you can continue looking through the camera as someone else moves the lights for you. That way, you can see what happens as the light moves. There are times when some really cool things happen when you lease expect them to. If you remain at the camera to observe the changes in the light, you may be able to see some of these “happy accidents” as they happen.
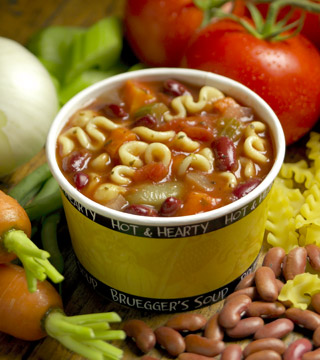
Soup is one of those things that need a bright reflection. You want to place the light just far enough behind the subject so as to start to get a reflection on the meniscus of the perturbing objects but not so far behind the subject that you get a glare over the flat surface of the liquid.