
Food Photography Tip – Crumb Strategy for the food photographer
How to make your food photography look more Casual
There are times when a professional food photographer will want to have everything in his photo to be absolutely perfect, and then there will be other times when he will want things to look a little more “casual”, or less perfect. Usually, for advertising purposes, everything needs to be perfect, but if the food photography assignment is for more of an editorial use, things need to be a bit more casual, if not downright messy. So the question is, what is it in a photo that can make it look less perfect and appear more casual?
There are quite a few ways for a food photographer to make the photo appear more casual, and over the next few post, I’ll discuss the possibilities.
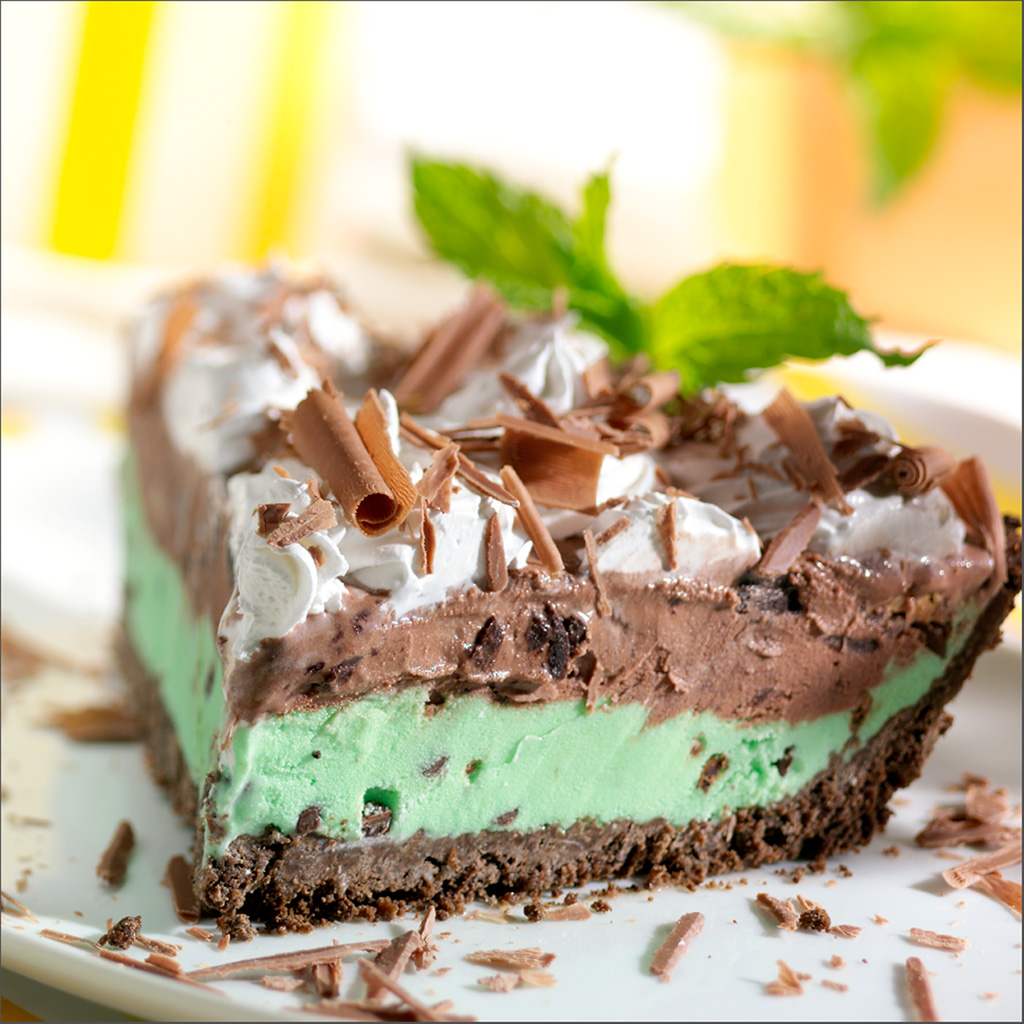
Crumbs – Probably the easiest way to make a food photo appear more casual is to add a few crumbs. Be careful though, it’s easy to get carried away. The tough thing to do is make the crumbs look like they actually belong where you place them. I’ve learned a couple of food photography tricks over the years regarding crumbs, so listen here and maybe I can shorten your learning curve…
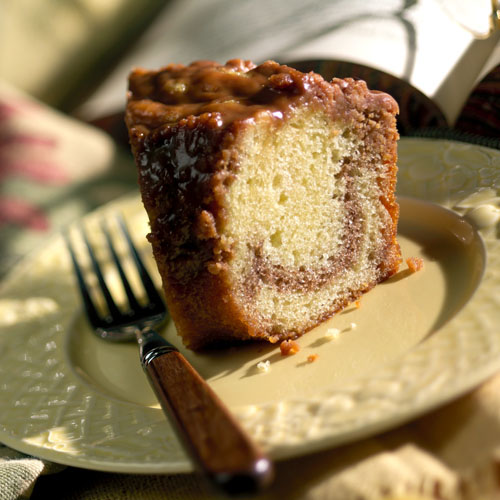 First, the crumbs need to be of the correct material. For example, the crust of bread usually makes crumbs, while the inside of the bread, being moister, usually doesn’t turn into crumbs. Don’t try to make crumbs out of stuff that doesn’t crumble.
The crumbs need to be made of different sizes. Very small crumbs, or even “dust” should makeup most of your crummage, but a few medium sized pieces along with a couple larger ones, make everything look a bit more believable.
The crumbs need to be places in places where crumbs may actually have fallen, in real life. Just because you have a hole in your composition, doesn’t make it an ideal place for crumbs. You crumbs should be placed where they would have been created. If bread is broken open, most of the crumbs should be placed between the two broken halves or right next to the cuts. Sure, a few renegade crumbs may be places here and there, but the majority should follow reality. Another subtlety of crumb application, is to place the majority of the crumbs close to the crumbling object and then, as you get a little farther away from the subject, lessen the density. It’s sort of like the inverse square law of crumbs…
For me, as an experienced food photographer, I still struggle with the amount of crumbs I should add to a photo. They say less is more, and not for a minute do I believe that. I can tell that more is more and more is usually not better. Usually less is better. What’s nice about digital food photography is that you aren’t blowing money if you choose to shoot variations. And if you’re smart, you’ll shoot a few variations with more and less crumbs. That way, you can spend some time and mull over the decision and even ask for other people’s opinions to confirm yours.
Okay… Everything I’ve written up to this point about crumb application is all very important, but the real challenge to the aspiring food photographer, is the actual arrangement of said crumbs. The key is for the arrangement to be totally random, but logical. Crumbs almost never line up as they do when you swipe your brush across the set. Make the arrangement as totally random as you can. And that’s not at all easy to do. Trust me! :o)
Crumb placement is a real art. I’m not joking. If you can answer the following questions, them maybe you’ll be well on your way to being a crumb placement artist.
Where would the crumbs actually be if the shot wasn’t a fake food photo, but a real dish of that particular food? Where would they look good? Do they look natural? Are there too many of those little suckers? Are they the right size? Are there any crumbs where there shouldn’t be? Am I making the food photo look too messy? Are they random in placement? Should there be any crumbs in the first place. If you can answer these questions and then cover your butt by shooting multiple variations, you’ll be golden…
I hope you’ve enjoyed this food photography tip. For more info, check the site from time to time. and please take a minute to sign up for my email list. I promise not so sell your name of spam you. I’ll just let you know if I have any new articles coming out.
