
 How to Photograph Ice Cream
Ask any professional food photographer, and he’ll tell you that ice cream is probably the most difficult food to photograph. Most foods can sit in front of the camera for minutes while the photographer makes his adjustments, but ice cream will only last a few seconds. For years now, I’ve been working with several ice cream companies and have come to learn many of the ins and outs of what is necessary to create quality photos of ice cream scoops, cones, Sundays, and cakes. This article will give you the tips and tricks needed to successfully photograph ice cream. After reading this article, you will know how to photograph ice cream, or at least how professional food photographers photograph ice cream…
Disclaimers:
Secret Food Stylist Techniques
I won’t be able to share everything I’ve learned over the years because some of those techniques are considered trade secrets by some of the ice cream stylists I’ve worked with, but I’ll do my best to teach you what I can comfortably share without betraying any confidentialities.
Advertising vs Editorial Ice Cream Photography
Not all Ice Cream shoot are scoops, cones, and Sundays!
I am primarily an Advertising Food Photographer, as opposed to an editorial food photographer. The difference is that I, as an advertising food photographer, am usually hired when a client is trying to sell their food products. Editorial food photographers are usually hired to create the best “picture” possible, and the food is of secondary concern, when compared to the overall appeal of the photo. My job is to make the food look as good as possible, whereas the editorial photographer’s main concern is making beautiful photos. Keep that in mind as you read this article.
I’d like to apologize in advance to all those feminist English majors that may object to me using “he” as the photographer and “she” as the stylist. It just makes my job a little easier, so…
Photographing Fake Ice Cream vs. Real Ice Cream
I’m no lawyer, so take that into account, but as I understand it, it’s okay to use fake ice cream for editorial purposes, but not advertising uses. We’re allowed to use fake ice cream in restaurant menus, but when representing or selling a particular brand of ice cream, the ice cream must be real. If you are a lawyer and can set me straight on this without using too much legal jumbo, I’d appreciate an email. I’d be glad to add your explanation and give you a link too.
Before The Ice Cream Shoot
If you’re not a professional food photographer and want to skip the prep work and go straight to the “technique” part of this article, then you’ll want to scroll down to the “Photographing Ice Cream” section of the article, but to be honest, for ice cream, preparation is half the battle.
Find a Great Food Stylist
If you’re an aspiring food photographer and just reading this to pick up a few tips, I totally understand, but if you’re a professional and your career is depending on this, I highly recommend that you find yourself a professional food stylist with experience styling ice cream.
Styling ice cream comes with a very long learning curve and if your reputation on the line, it’s best to avoid as much of that learning curve as possible. If you can find a food stylist that has a lot of ice cream experience, you’ll be way ahead of the game. Ironically, some of the older / best stylists are not listed on this site, because they don’t have web pages. They’re so busy and so much in demand, that they don’t need websites.
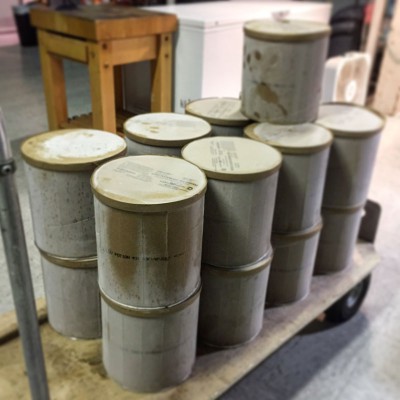
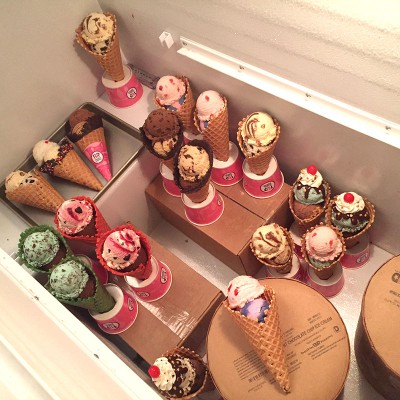
Make sure you have enough ice cream for the shoot! You don’t want to run out!
Have Enough Ice Cream and Props
It’s important to have plenty of ice cream on hand for the shoot and make sure that there is more than enough for the job, even if it means renting extra freezers. Ice cream is cheap, compared to the labor involved in a professional photo shoot, so don’t be penny wise, and pound foolish.
Especially when shooting ice cream, you’ll want to have duplicate containers (dishes). If you will be shooting the ice cream is a particular bowl, you’ll want to have on hand at least two of those bowls, one for a stand-in, for your lighting and setup purposes, and the other for the stylist to work with. The stylist may need to freeze the bowl and if you don’t have at least two, the shoot will be slowed down significantly.
Ice Cream Temperature is Extremely Important!
Besides having enough ice cream, you’ll want to get it a few days before the shoot, so that you can assure that it reaches the proper temperature. You might think this is a food styling issue, but the reality is that since the temperatures of the freezers are set so far before the shoot, it ends up being the photographer’s responsibility.
So what is the proper temperature to store ice cream for a photo shoot?
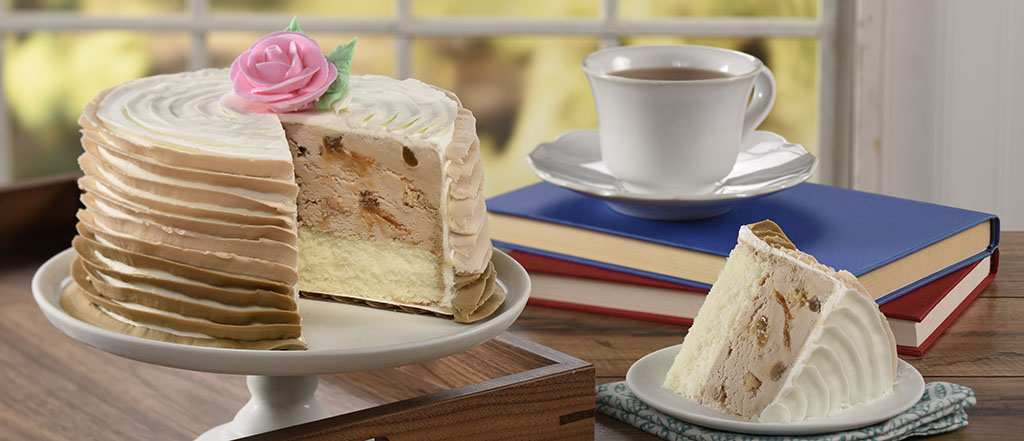
Ice Cream Cakes melt too!
Drum roll please…
Ideally, you’ll want to have at least two different freezers, set to two different temperatures. If the ice cream is too cold, then it’s difficult to cut and scoop properly. If the ice cream is too warm, then it melts too soon in front of the camera. The solution is to have the “warm” ice cream in one of the walk in coolers before the stylist works on it, and then have a colder freezer that the stylist can transfer it to in order to cool down, before going out to shoot.
If you’ve ever seen a stylist try to cut an ice cream cake that was just taken out of a freezer set to -20, you’ll understand what I’m saying. Rocks are not easy to cut.
The “warm” freezer should be set to around 0 to +5 degrees (F) and the colder freezer should be set to as low as possible, which usually ends up being about -20.
Most freezers don’t come with a thermometer, so you’ll need to buy one to keep in each freezer. That way, you won’t be guessing about the temperature.
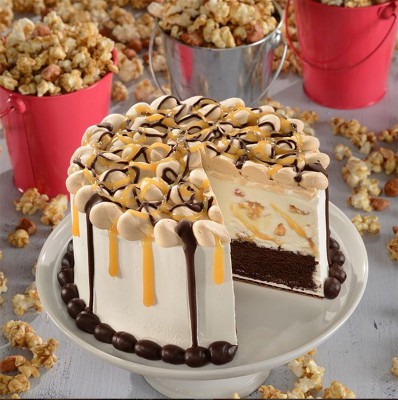
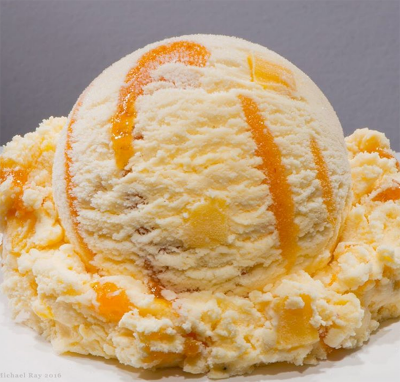
I had a tough time telling the stand-in ice cream for the hero…
A word of warning here. Temperatures change slowly in a freezer full of ice cream, and it can take days to stabilize. Make sure that you have the temperature is set in each freezer well ahead of the arrival of the ice cream. If you don’t, the ice cream itself will lower the temperature of the freezer and you won’t know the true temperature setting. You can tweak the temperature setting and the freezer will take forever to change, so you’ll be tempted to change it even more. It is like chasing your tail.
Another warning… This may seem really obvious, but if you rent supplemental freezers, make sure that they are not plugged into a “switched” so that the power will go off when you turn off the lights to leave the studio at the end of the day. Don’t ask me how I know not to do this, but let’s just say that it’s a good idea to confirm that the electricity stays on over night…
Okay, yet another warning… Defrost the freezers a day or so before the arrival of the ice cream. Many stylists will prep the ice cream and let it sit uncovered in the freezer. If ice crystals fall from the lid of a “frosted-over” onto the product, it can cause problems. Be kind to your stylist and defrost your freezers.
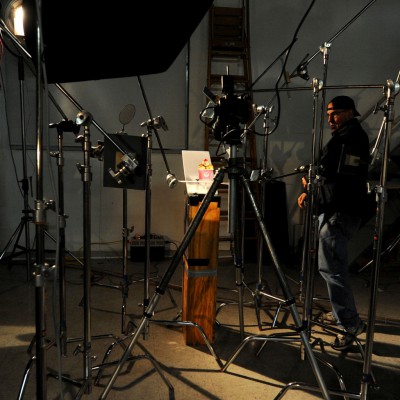
The Ice Cream Photography Studio
The temperature of the photo studio is extremely important too. When I first started shooting ice cream, I just assumed (and you know what they say about that!) that the colder the studio the better! I even know if a local photographer that would rent a freezer truck to use as his studio. It makes sense, doesn’t it?
Well, about a year ago, I started working with a food stylist that specializes in ice cream photography and she has a whole different preference, and since she was the expert, I went with her suggestions. She likes the temperature of the studio to be 60 degrees, not warmer and not colder. She will actually let me know when it reaches 61 degrees, she’s that in-tuned to her environment.
When I asked her why not set the temperature colder than 60, and she told me that if we did make the studio any colder, everyone would end up being miserable and the shoot would suffer. She right, and I totally agree. And with a multi-day shoot, that would become even more of an issue. I don’t know about you, but being in the cold all day really zaps the strength out of me. So I am happy with 60 degrees. It seems to be just cold enough to not let the ice cream melt too soon and still warm enough so that the crew doesn’t mutiny.
Shooting ice cream in an environment complicates things…
Humidity of the photo studio
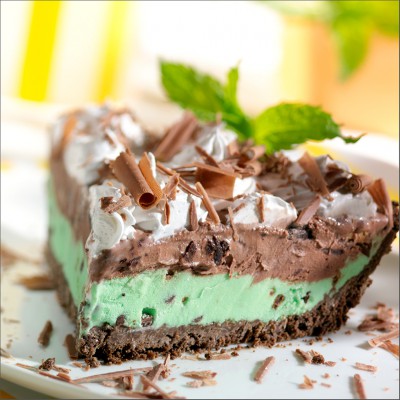
Humidity can be a problem, especially in the summer months, and especially when shooting chocolate flavored ice cream. Chocolate tends to frost over and the color becomes muted. When shooting in the summer, I will rent industrial strength dehumidifiers and that will help dehumidify the studio, and that seems to help a little.
Supplemental Air Conditioning
Getting the studio temperature down to 60 degrees in the winter, here in Pennsylvania, is not a problem. In August though, it’s a HUGE problem. My studio wasn’t designed to be a cooler and I have to place insulation over all my windows and to rent water-cooled AC units in order to assure that the temp stays at 60. This can be expensive, with rental costs, electricity, and even water costs, but there doesn’t seem to be much of an alternative.
For smaller shoots, I sometimes build a 16’ by 16’ foot temporary shooting room inside my studio. That way, I can run all my AC units into that smaller room, saving all kinds of energy. When I need to run multiple sets, I have to cool the entire 50’ x 50’ studio.
Another suggestion here… The photographer and the stylist need to have the studio cool, but it’s best to keep the clients comfortable, so I run a small portable heater under the client’s work table. A warm client is a happy client, and a happy client keeps coming back.
Photographing Ice Cream
 When it comes down to it, photographing ice cream is not very different than shooting other food, with the exception of the amount of time before the food deteriorates. After too long in front of the camera, most foods just look dry or cold. With ice cream, it ends up in a puddle….
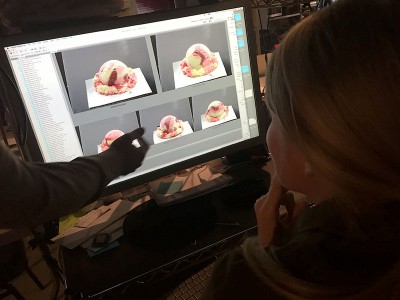
The Importance of a Good Stand-In
Here’s how a food shoot works… Since food deteriorates as it sits under the lights, the stylist prepares a “stand-in” for the photographer to use for composition and lighting. A “stand-in” is food that closely resembles what the “hero” food will look like, but is not as “fresh” as the hero will be. Once the photographer is happy with the lighting and composition, the stylist will bring in the “hero” for the final shot. A test shot will be made, and minor changes may be required to compensate for the differences between the stand-in and the hero food. With most foods, the “tweaking” time between stand-in and hero, isn’t a big deal. It may take a minute or two, but the food will usually still look good. With ice cream though, that minute or two doesn’t cut it. Ice cream needs to be shot faster than that. To lessen this tweak time, it’s important for the stand in to be as close to the hero, as possible.
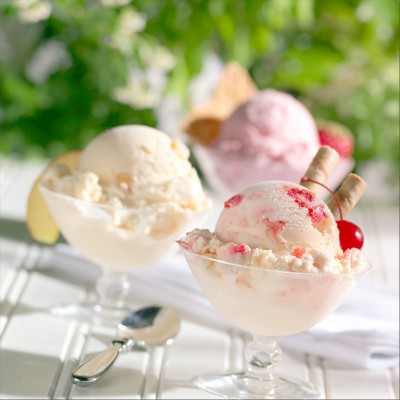
Fake Ice Cream as Stand-In
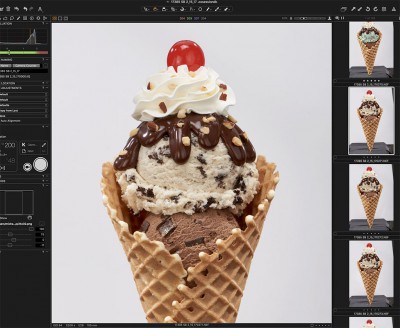
Over this last year, I’ve been working with a stylist that does an amazing job at creating extremely accurate stand-ins with fake ice cream. I can not tell you what a difference this has made in the quality of my photography. Her stand-ins look so much like the real flavors of ice cream that there are times when I cannot tell them apart. This really helps me when it comes to getting my focus, doing my lighting, and all that other “photography” stuff, and it keeps the tweaking time, to a minimum.
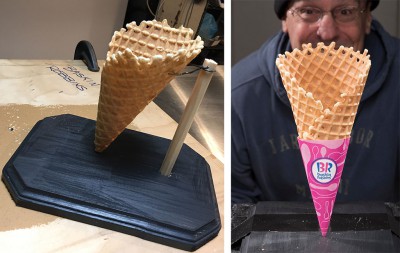
Here’s a little ice cream cone stand I made for the shoot. There’s more engineering to food photography than most people think.
You can find fake ice cream recipes other places on the internet, so I won’t go into that here, but what I want to say is that the color, size, texture, amount of whipped cream, cherries, and the number of inclusions (flavor hunks), is really important when creating a quality stand-in for a photographer. If you’re a food stylist and reading this, please keep that in mind. It is extremely important!!!! An ice cream photographer doesn’t have time to make many adjustments to compensate for an inaccurate stand-in, so the better it is, the better then resulting photo will be.
Best Camera For Shooting Ice Cream
If you’re looking for the definitive “best camera” for shooting ice cream, you’ve come to the wrong place. I don’t think that there is such a thing. I’ll tell you what I use and why, but I’m sure that other ice cream photographers use other equipment and do just as good a job as I do.
I use a Nikon D810 as my main food photography camera. I chose it because It’s state of the art and it matches all the Nikon lenses I already own.
The thing about food photography is that it is often used for signage or display purposes. Sure, it is used in magazines or on billboards too, but the resolution requirements of those two uses are relatively low when compared to display or signage. A sign is often times viewed from a relatively short distance, so it requires “print” quality resolution (300 dpi), but at a large size. Billboards, on the other hand, are always seen at a distance, so the resolution needed is very low (<150 DPI).
Best Lens for Ice Cream Photography
When shooting outlined shots, you need lots of depth of field, and you need a lot resolution too. The reproduction is usually for signage.
Since an ice cream photographer will need to be close to the subject, it’s important to have a macro lens in his arsenal. There may be times when he can use a non-macro lens to shoot ice cream, but I find myself using my macro lenses almost all the time.
My all-time favorite food photography lens is my 85mm f 2.8 tilt-shift macro lens, by Nikon. I love this lens. The funny thing is though, lately, I find myself using my 105 f 2.8 macro more and more. Unless I’m shooting a set, where I need to manipulate the focus, I find that the 105 macro is easier and faster to use. I also own a 45mm tilt-shift and a 200mm macro, but they seldom come out of the canes for shooting ice cream.
So if I had to recommend that you pick one macro lens for shooting ice cream, I’d say the 105 is fine, but to be honest, I’d still recommend a food photographer go with the 85mm tilt-shift. Either will work for ice cream, but the 85mm just gives you more control over the environmental shots.
How to choose the best lens for food photography
Depth of Field
If you’re shooting cones, scoops, Sundays, and items like that, you’ll normally want to shoot with as much depth of field as possible. If I’m shooting outline shots, I like to use f32 or smaller. That’s usually more than enough to get everything in focus, no matter how close I am to the subject. Shooting with maximum focus doesn’t make the shot look very sexy, but when your shots are going to be cut out, and placed on a graphic background, having everything in focus really helps out the artist. If I’m shooting more of an editorial shot, I’ll use selective focus, and shoot almost wide open.
Lighting for Texture
Lighting scoops is ALL about texture.
A scoop of Ice cream is very small. When you light something small, and you want to create texture, you have to use a small light source. Even a small light box is large in comparison to a three-inch ball of ice cream. To create as much texture as possible, I like to shoot with my fresnel spotlight. The quality of that light closely resembles that from a bare bulb head, or a light with a 5” reflector
Yes, a small light source, like a bare head, casts a crisp shadow, but that’s what you want to create the maximum texture. Too soft a light (big light source) erases needed texture. Use a small a source as possible and you will have as much texture as possible.
If you’re shooting ice cream in an environment, you’ll want to be careful about objectionable shadows, but keep in mind, the softer the shadows, the less texture your ice cream will end up having. There may be times when the look of the ice cream is more important than the look of the overall photo. You’ll need to make that call when you see it. I suggest that you start with a small source, and if it doesn’t seem to work, move up to a larger size. Most people find soft shadows to appear more pleasing, but they create less texture. The more texture you have, the more three dimensional your photo will end up.
Strobe vs Hot light
I’m assuming that I’m talking to photographers working with strobe lighting. If you are someone that uses hot lights, you’re going to have to REALLY work fast before you see puddles in front of your camera. I’m not saying it can’t be done. What I’m saying is that strobe lighting is preferable when shooting ice cream. The word “hot” light, should have given you a clue…
Yes, LED lights should work fine, but still not as good as strobe lights. Shooting small objects like ice cream usually means you’ll want to use small apertures on your lenses, and that either means lots of strobe power or long exposures. Since the ice cream WILL be melting the instant it leaves the freezer, long exposures tend to capture motion in the melting ice cream, causing a blurry image. Strobe freezes (pardon the pun) that motion.
Lighting for shape
 Lighting a scoop of ice cream is the same as lighting a sphere so if you know how to light a sphere, you can light a scoop of ice cream. When you’re lighting an ice cream cone, then you need to know how to light a cylinder, with a sphere on top.
If you want to know how to light, you need to study how illustrators do what they do. There are just a few classic shapes and there are websites on how to illustrate them. Studio how an illustrator shadows the surfaces of a given shape, and that will give you a starting point as to where you put your shadows.
I find it useful to think about lighting in terms of where to place the shadows, and not where to place the light. Try that and I bet your lighting skills will improve.
In a nutshell, I start with a high, 3/4 rear, small light, and use mirrors to create the rest of the shape and texture. After I get the shape and texture I want, I add large boxes to fill in the shadows. That’s it… It’s not something that I can really explain. It just sort of evolves.
Each scoop, cone, Sunday, and milkshake, is a little different. When I start lighting, I get into a “flow” state, manipulating lights and mirrors as needed. The idea is to know what you want the shot to look like before you start lighting, and then keep tweaking the light until it looks like you imagined. Food Photography lighting is half pre-visualisation and the other half engineering.
Speed
 Shooting ice cream is all about speed and efficiency. You can take your good old time lighting the fake ice cream, but once the real stuff hits the set, you gotta move fast. Take a shot and adjust as needed. Just do it really fast! If the stand-in was good and your lighting worked with it, then you will most likely need little adjustment between stand-in and hero. You can’t sit around and have long discussions about possible changes, with your art director, while there is real ice cream on set. Make sure that you make all the big decisions while the stand-in is on the set. If you wait too long to shoot the hero, it will melt and the stylist will have to start from scratch, and the shoot will be delayed.
Sauces
I’ve talked about lighting ice cream and using small light sources for maximum texture, but that all goes out the window when it comes to lighting ice cream covered with a sauce such as hot fudge. Caramel, hot fudge, or strawberry sauce are smooth and shiny, and you need to take that into account when lighting. Large light sources such as boxes tend to work best with these types of surfaces.
Ice Cream Styling tips
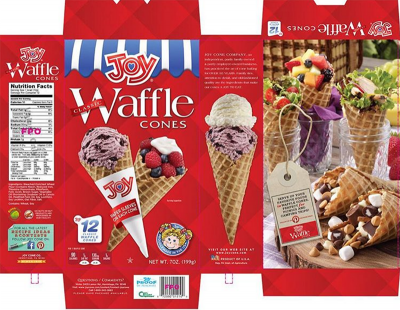
Here’s another example of when you can use fake ice cream. If you’re selling the cones and not the ice cream, then you’re fine…
Breathing on the ice cream – Sometimes it helps for have a straw ready so you can blow on the ice cream, right before you shoot it. This is especially helpful when shooting chocolate, which tends to frost over. By blowing your warm breath on the ice cream, it melts the frost a little and reveals the true color of the ice cream.
Prep time for the food stylist
Since the quality of the stand-in ice cream is so important to the success of the shoot, it’s VERY important that the stylist has sufficient prep time to make these stand-ins. Make sure that you budget plenty of prep time for your stylist.
Well, there you have it, pretty much all I know about how to photograph ice cream. If you have any comments or suggestions, you can reach me at mike@foodportfolio.com. I’d be especially interested in links to other resources that would be valuable to people interested in ice cream photography. Are there food photographers or stylist that you know of, that specialize in shooting food? I ‘ll link to them here. Do you know of any other especially good articles that talk about shooting ice cream? Send me a link. My desire is to make this the best possible resource for people wanting to know about how to photograph ice cream, and if you’d assist me with that, I’d be grateful.
If you find this article helpful and think that others might also, please share it with your photography friends!
