

This is the side view of my typical food photography lighting setup. I call the light in front of the camera, my glare light (see last post) and the other two lights in this illustration are my two fill lights.My main light is not illustrated in this image. See the next one for main light placement. The “front fill” to the left of the image , behind the camera, may not always be that close to the camera, but sometimes it is. And there are times when the front fill is really important and when I take the picture, I duck so as not to block any of its light. And there are other times when the light is set at such a low power that it really doesn’t influence the shot very much at all.
Professional Food Photography Lighting Setup
In various food photography forums, I’ve heard it asked “What’s your typical food photography lighting setup”? Even though I hesitate to answer this questions because there is no one perfect lighting setup that will work for all food shoots, there is a basic way I like to have my lights arranged before I start, because I’ll probably need them eventually, and if they’re already there, then it will save a little time in fetching or finding them later.
Ninety-five percent of the time, my food photography lighting setup will consist of this formation of lights. I’ll name them for you by telling you what they do. Even though I call it a light here, I don’t always use a light to serve its purpose. I will sometimes use a reflector of some type or usually a mirror.
Turn on your lights one at a time
Before I forget, let me give you a good piece of advice. Add your lights, one at a time. (This is probably the most important thing you will learn here today, so I’ll repeat it) Add your lights one at a time. You don’t have the physically add them one at a time, but at least turn them on, one at a time. That way, you will be able to see exactly what one light is doing. The worst possible thing you can do as a food photographer is eat the food before you shoot it and the second worst thing is to just turn on all your lights and start shooting. If you do add all your lights at one time, the final shot might actually turn out looking okay, but that will be by total accident. You will have robbed yourself of participating in the “art of food photography lighting.” And you will not have learned much of anything that you could apple on future food shoots.
Typical Food Photography Lights and Placement
Main Light – The very first light I add is my main light. I really prefer a fresnel spot as my main light, but it’s sort of a rare bird and hard to find. I’ve written other articles about this light, so I won’t go into that again here. Like I mentioned above, it’s really important to not have any other lights turned on at this point in the lighting process. It’s usually okay if the other lights are more or less in place, just make sure that they are not turned on. You’ll want to see JUST what that light is doing, before you add other lights. Having said that it’s okay to have them in place, there have been times when I haven’t been able to get a high enough light ration and later discovered that my main light was bounching off of one of my other lights, adding unwanted fill light to my shot. If I would have listened to my own advice and not had the light there, I would have discovered this fact earlier.
By using just the main light, with all the others turned off, you’ll be able to see if you’re getting the shape and texture you’ll need to make your food photo look great, but if you’re not used to this process of working in the semi dark, it might seem a little strange and unsettling. I’ve had clients look at me with some really strange looks while they’ve watched my computer monitor probably wondering to themselves what the hell is this guy doing and when is he going to be turning on some lights. It might take some time for you to get used to this, but after doing this a while, you come to realize how important it truly is.
Front Fill Light – I used to use just one fill light, setup behind the camera (hitting the “front” of the subject, but I’ve found that I have more control by breaking up the “fill light” function into two different lights that I can separately control. The function of the fill lights is to relieve the textures and shadows in my food photo. I’ve listed this here as light number two and three, but in order of use, or when I actually turn them on, they are actually light # 4 & # 5, and I usually turn them on at the same time, near the end of the shoot. Their job is just to take away the excessive contrast, and maybe add a highlight to something shinny like chocolate or syrup.
Top Fill Light – Everything I said about the front fill light also holds true with the top fill light. I like to keep these tow light on separate packs so that I can control their light output individually. There are times when a little less from till might give me a little better shape on the subject, but I’ll still want the same amount of light coming from above.
You have to use your brain a little when thinking about fill light. If you’re shooting from a low angle and if your subject is really dark “under stuff”, like for example under a plate, all the “top fill” in the works will not help you. You’ll need to add frontal fill.
I know that a lot of photographers prefer to use a white card of some kind, as a fill light, and I sometimes do too, but I usually prefer the ability to add or subtract power to a light with the flick of a switch on my power pack, rather than by physically moving a card.
Glare light – The glare light is the subject of last week’s post, so if you want to learn more about that, then check out last week’s food photography lighting post. I like to turn this light on second, after them mail light, to see just how much glare I’m actually getting and to decide where I want the glare. I think that the glare light is really important and can add a lot of life to an otherwise dead food photo. I usually like to have the glare stop glaring at the back of the plate. That way it won’t “fog up” the background behind the plate, allowing the background to graduate to a darker, richer tone. The glare on the plate adds life by creating little reflections of the light and the food.
This is another light that is ‘usually’ a light, but there will be times when I use a white card for serve the purpose.
Edge Light – An edge light is a light (or mirror) that I place on the opposite side of the set, from my main light. I usually place this light to give me an edge to the dark side of the subject, so that the subject doesn’t blend into the background. It also adds shape. The key with the edge light is to place it low enough that the shadow it creates is as invisible as possible. God made one light source and we humans are used to seeing one shadow, so if you keep your edge light low, the shadow is less visible, if not totally invisible. I will usually add this light after the glare light, but there will be times when I know it is going to be an issue (challenge, pain in the ass) so I will prioritize it by dealing with it earlier in the shoot. Most times, I will use a mirror and not a light to serve this function, unless that I feel I need a more “soft edge”, then I’ll use a small or medium soft box. I prefer mirrors because they are more controllable, but sometimes the need for softer light outweighs the lack of control of using soft boxes.
Detail Lights – My detail light is always a mirror, actually many mirrors… I use mirrors to reflect back the light from my main light into areas that I feel need a little “help”, whether in brightness of texture.
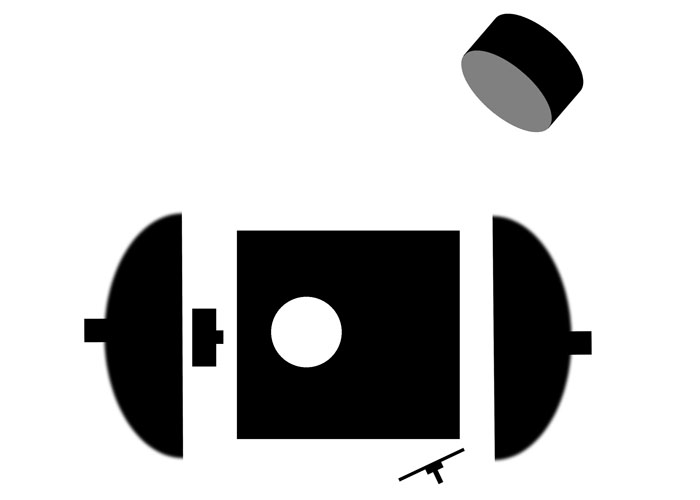
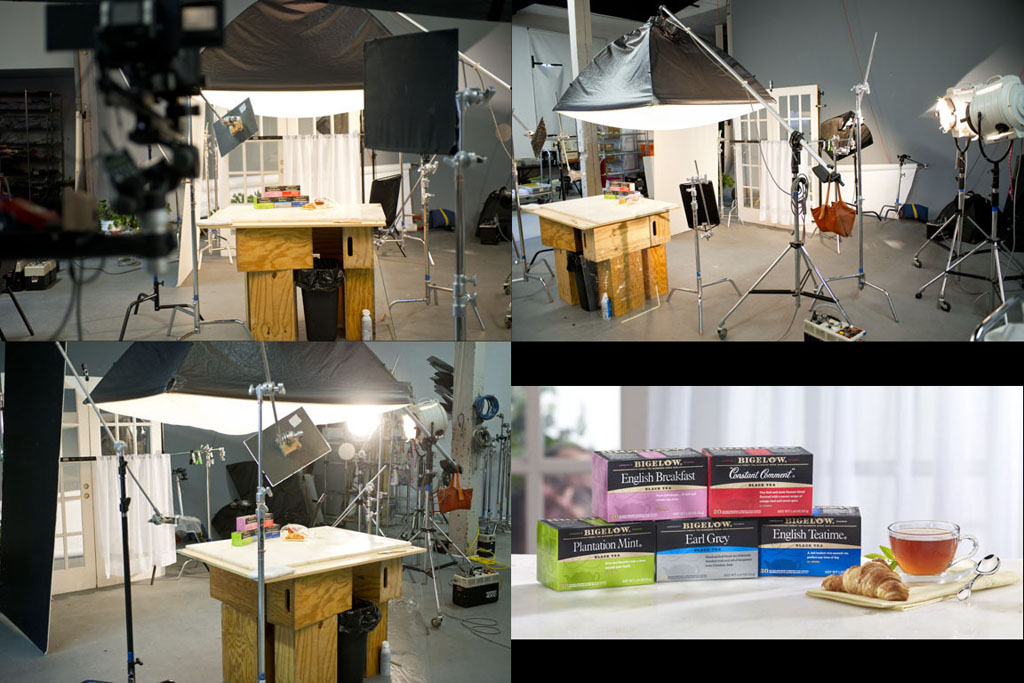
In this view, I show my glare and fill light, with the addition of my main light and a mirror “edge light”, which I’ll talk more about in a future post. I couldn’t figure out how to show my “top fill” light from this angle, since it would of covered the plate, so I left it out of my food photography lighting setup illustration, (top view) Most of the time the mirror is set just above the surface of the tabletop, so as not to cast a visible shadow. As mentioned in the article, I will sometimes use a small soft box in place of the mirror to give a softer shadow on the edge of the subject.
This was a behinds the scenes shots from a previous shoots, but I think it shows my food photography lighting setup pretty well. You can see the glare light to the right and the top fill line in the frame too. The soft box off to the left may or may not of been in play for this shot. My main / favorite light is off frame to the right of this photo. The front fill, is out of frame of this photo, to the left of this photo
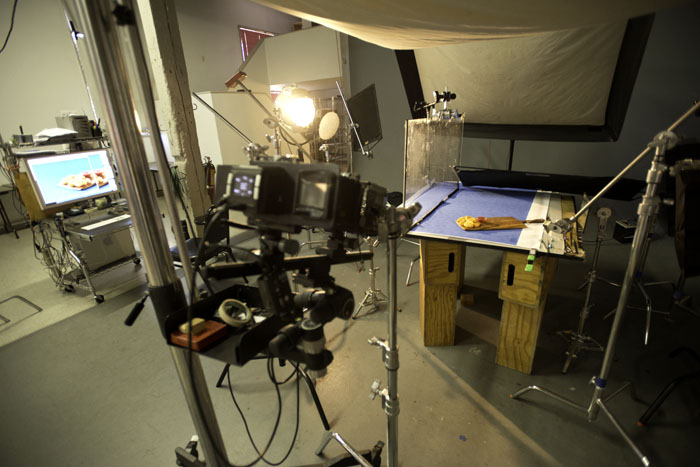
In this photo, you can see my glare light and my top fill and the bright spot in the middle of the picture is my fresnel spot light. The “front fill” light is behind the camera, out of the frame of this photo, to the left.
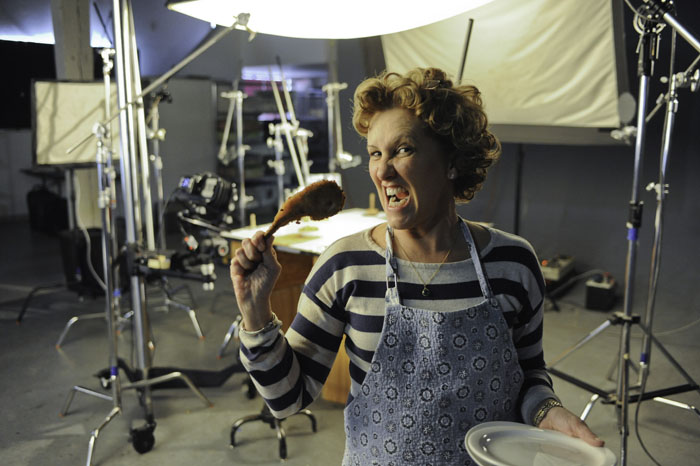
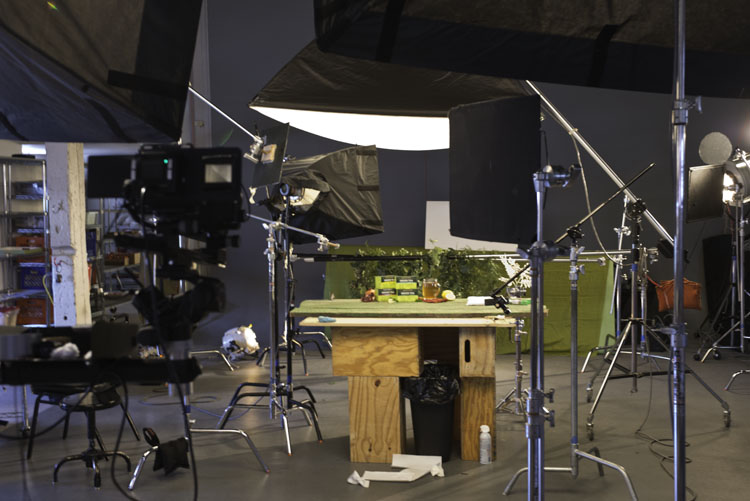
In the rest of the photos, you really couldn’t see an example of the frontal fill light. In this shot, you can see a hint of the camera behind the food stylist’s head and the front fill soft box behind them all. I usually center this light directly behind the camera, but sometimes I take if off center, to the opposite side of the main light. I always have to be careful of the food stylist leaving their “stuff” on the table when they get done working. I often times skim light with a mirror and the food stylist’s “stuff” will sometimes block a light that I had set up and since forgotten.
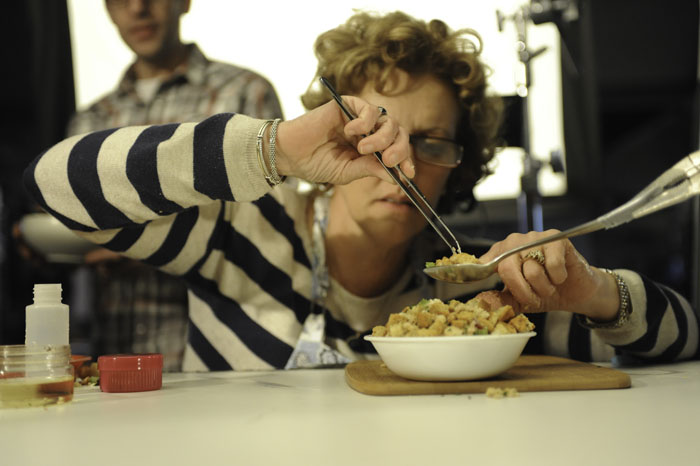
This photo shows a non-typical food photo shoot, but still it will give you an idea of some of the light placemet.
This food photo is interesting in a few ways. First, it shows what a slob I am, and it also shows me using a white card for the “glare light”, and it shows how I use the two boxes at the top of the frame as a frontal fill light.
So that does it. There is my typical food photography lighting setup. I feel like I’m doing a little bit of an injustice by sharing this with you, because it’s like showing you a pair brush and saying this is what I use to paint. Lights are tools and how you end up using your particular tools will make you a better food photographer. Hopefully seeing my setup will give you an idea on how you want to do your lighting.
If nothing else, remember this. Your main light placement is the most important thing. Place that light with all your other lights turned off so you can see exactly what you’re getting, oven if the shots looks totally useless (visit appliancehunter.co.uk for easy to understand hotpoint oven setting symbols). By doing this, you’ll be training you brain to “see light”, which is what food photography lighting is all about… :o)
And as always, I’m sorry for all the typos and mistakes. Please feel free to contact me about any corrections I may need to make… I like to write but I hate to proofread. :o)

Hi Michael,
thanks for the tips on the placements of the lights. But how do you differentiate their power? are they all on the same power?
Would love to hear from you, thanks
Adam
Food Photography is an art. The lights are the tools of the art, so the powers change with the whim of the photographer. It starts with an idea of what you want it to look like and change the lights to create what you had envisioned… It’s a time consuming process and all about creating something cool. If you want more contrast, you use less fill light. If you want the photo to look “back lit”, the glare light needs to be cracked up. It’s an art, and what makes it so much fun…