
Three ways food photographers blow out the backgrounds, giving their food photos that “light and airy” feel
One question that I get asked all the time is “how do you get that “light & airy” background” look? I’m assuming that all food photographers have their own individual ways of doing things, but let me give you three ways that I know of doing this…
Choose the right props and background
If you do decide you want your photo to have that high-key, blown-out look, it’s a good idea to prop the image and select a surface with that in mind. Starting out with a light colored or shiny background is essential. Selecting light-toned props will also help you created this look you’re trying for. It’s hard to make something dark, look light and airy. You might also want to use some type of faceted glass in the background to catch specular highlights to give the background some shimmer too. It’s worked for me.One question that I get asked all the time is “how do you get that “light & airy” background” look? I’m assuming that all food photographers have their own individual ways of doing things, but let me give you three ways that I know of doing this…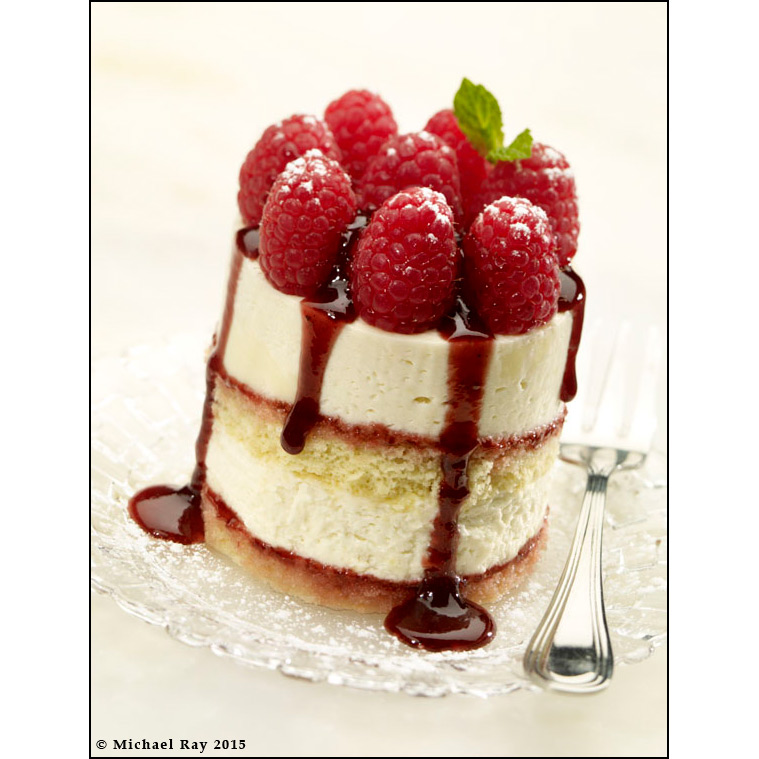
Choose the right props and background
If you do decide you want your photo to have that high-key, blown-out look, it’s a good idea to prop the image and select a surface with that in mind. Starting out with a light colored or shiny background is essential. Selecting light-toned props will also help you created this look you’re trying for. It’s hard to make something dark, look light and airy. You might also want to use some type of faceted glass in the background to catch specular highlights to give the background some shimmer too. It’s worked for me.
Basically, in food photography, there are three ways to “blow out the background”. If you know of any others, please let me know by leaving a comment in the form below.
#1 Subtract light from the subject and keep the same amount of light on the background
This is a photo of the illustration above. Notice the shadow around the cake.
There are several ways to do this, but the way I like to accomplish this is by using dots, fingers, and scrims. Basically, these are light modification devices, originally created for the film industry, to lessen the light hitting an object, by partially blocking the light. These types of devices decrease the light without diffusing it. The crispness of the shadows created by the light source remains the same. The light is just lessened, not diffused. These light modifiers are made of either black netting material or some type screen material. On occasion, I will actually use window screen for this purpose. Metal window screen has the added benefit of not being flammable and that comes in handy when you mistakenly place the material too close to the light source. Don’t ask me how I know this… :o)
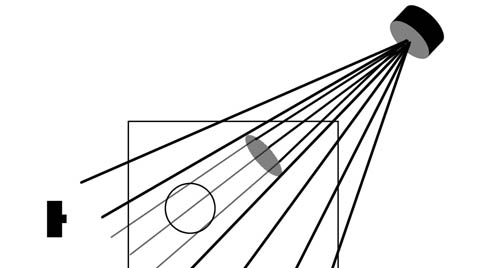
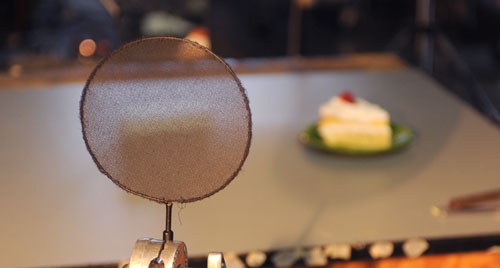
This is a side view, and not a very good illustration. I’m trying to show my spot light being filtered by a double “dot”. A double dot will decrease the light my 2 stops, leaving everything not being blocked by the dot, two stops brighter.
The idea of using these screens is to lesson the light hitting the subject while letting the full intensity of the light to hit the background. That makes the subject darker and when you compensate the exposure to properly expose the subject, the background becomes “blown out”.
#2 Add more light to the background than to the subject
Yes, adding more light to the background than to the subject is sort of the same thing as decreasing the light on the subject, but this is a little different. Here, the idea is to actually use an independent light to light JUST the background. The method mentioned above uses the same light to accomplish this same goal.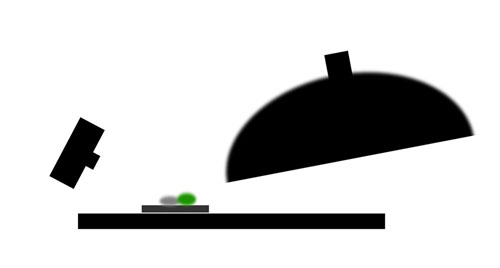
I often use a light box behind the subject and crank the power of that sucker way up. This will usually over-light the background and give you the desired effect. The tricky thing about using this technique is that you don’t want the backlight to influence the lighting of the subject. This is easier said than done. This is especially true if the camera angle is relatively high and there isn’t a whole lot of room above the subject, in order for the background to “blow out”.
This “background light” will usually want to spill over and and put some unwanted light on the subject. Sure, this light blasting out the background will sometimes cause some “happy accidents” and some really cool effects, but there will be times when that light causes unwanted highlights on the subject. This is especially true if your subject is shinny, in the case of syrup or sauced foods. I will sometimes use an opaque flag between the background light and the subject to help prevent this from happening. Another thing that seems to help is to use a light box (as a background light) with a “lip”. This “lip” sort of works like a built-in flag.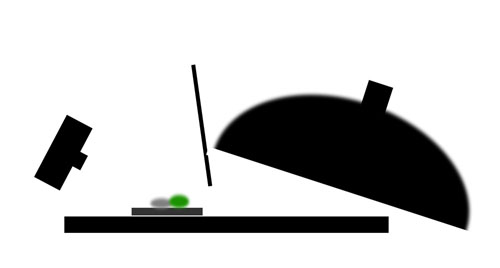
Another challenge I have in using this “box in the back” method is that it often times gets in the way of my “main light”. What will happen is that I get the main light positioned to give me the lighting I want on the subject and then I’ll try to stick in the rear box only to find that the box blocks the main light. One way to help get around this is to use a relatively small box to illuminate the background. A smaller box is less likely to get in the way of my main light
#3 Light reflecting into a shiny background

I think this shot is a good example of of using a reflective background to help blow out the background. To accomplish this look, I had a vertical “glare light” behind the set.
If I have a background that is shinny, and I want to blow out the background, I like to drop the rear box down really low and let the light reflect into the background. By dropping the rear of the box to the surface behind the set, the light reflects into the background, making it appear brighter. The background also ends up actually being brighter just because it is so close to the light. The downside to using this method is that by angling the light in this direction, it ends up pointing directly towards the subject and influencing how the subject is lit. To keep the light from affecting the subject, I usually use a flag to keep as much light off the subject as possible.
Another method is to drop the glare light down really low. This technique will work because it reflect light into the background, but because its so far away, it doesn’t influence the subject all that much.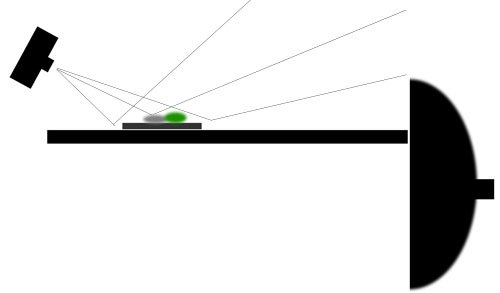
So next time you’re trying to get that light and airy look, give these methods a try and see if any one them work for you. I hope that this has been helpful. For more info, please subscribe to my email list (below) and I’ll keep trying to teach you more advanced food photography techniques.


Hi Michael,
Another great lesson. Thanks for sharing.
Regards.
Hector
Michael,
Another excellent article.
When I am working on the sets of film or television productions as the Director of Photography, we always consider a “dot” as being solid, not transparent in any way. To be semi-transparent is a property of a scrim.
Was it you or someone else where I read a while back who was using glass building blocks (Home Depot, Lowe’s, building product stores, etc.) to create interesting patterns of light? Another technique I have seen is where a photographer interposed a sheet of glass between a kicker or back light then placed little pieces of colored material to both create shadows and patterns that had some color. Interesting.
Later,
Terry
Those are some good ideas. I’ll need to play with them a little…
That’s really interesting Terry. I’ve seen some photographers use drapes with various hole patterns in them and then filter light through these translucent drapes. I’ve even seen some food photography where this kind of “light pattern” technique was used. It’s pretty amazing how one can shape and modify light.