
Lighting for Food Photography – Creating Texture
A food photographer’s job
Like I mentioned in my earlier post “Lighting for Food Photography – Shape”, a food photographer’s job is to take a three-dimensional reality (the actual food in front of the camera) and translate that into a two-dimensional representation (food photo) and retain as much of that third dimension as possible. The human eye can look at something and see details that the camera cannot possibly capture so the food photographer must use lighting to emphasize or de-emphasize the elements of the photo to achieve the desired translation (the food photo).
In other words people… The more texture that you can create in your photo, the better it usually is. If you’ve heard the word “flat” to describe your food photography, then you need to use lighting to create more texture and shape to your photos. Texture is what brings a food photo to life.
Maximizing texture in your food photography
There are three things that affect the texture in a food photo. The first is light source size and the second is light source placement. The third is the amount of fill light used and we’ll talk about that in detail in another post. Styling is another way to enhance the texture of the food in your photo, but we’ll talk about that in another post too…
Photographic light source size and how it affects texture in food photography
You can’t talk about texture without talking about shadows, so lets define the two types of shadows so that we don’t get confused. For the sake of our discussion let’s say that there are two types of shadows. I will be using the terms “shadow” and “cast shadow”. I use the word “shadow”, as in… “There is the light side and the shadow side of a pepper”. The other type of shadow is the “cast shadow” and is the dark shape projected by something onto something, like your shape you project onto the ground when you stand in direct sunlight.
Large light sources make soft shadows
If you’re into photography at all, you know what a light box is. It’s basically a way to change a small light source, (the original flash head) into a large light source, (the front surface of the box). An umbrella does basically the same thing except that the box contains any light from escaping and bouncing around the environment. Both the umbrella and the light box create larger light sources out of the original ones.
Softer Cast Shadows
The larger the light source, the softer the subject’s cast shadow will be. For some reason, most people prefer soft cast shadows rather than crisp ones. I don’t know why that’s true, but it is. I think it’s because a soft cast shadow is less noticeable and therefore does not distract from the subject itself and I suppose that is why most photographers prefer to use soft boxes to light their subjects.
Softer Shadows
Another thing large light sources tend to do is to create a softer more gradual transition from light to dark, on the subject. From what I can tell, this is interpreted as “harshness” by most people and is seen on more easily on cylindrical or spherical shapes. Subjects like people’s faces, or shapes like bananas or even shapes like apples tend to show this abrupt transition best. If the light source is relatively small (harsh), the transition between light and dark happens in a very small area whereas if the light source is larger in size, the transition takes place over a larger area of the subject. Most people tend to prefer a less harsh light when photographing most types of subjects.
Small Light Sources
Relatively small light sources, like bare flash heads and small light boxes tend to create crisper shadows and cast shadows. The smaller the source, the crisper the shadow, and like I mentioned earlier, people tend not to prefer crisper shadows and cast shadows. So why, you might ask, would anyone ever want to use a small light source? TEXTURE! One very big advantage of small light sources is that it tends to emphasize texture, and texture helps you make that two-dimensional food photo of yours just a little bit more three-dimensional.
My very favorite light source is a Norman 10” Fresnel spotlight. (I call it “My Big Ten-Inch”) There are other similar lights out there, I’m sure, but I have this one so that’s what I use. I’m pretty sure that Norman has discontinued offering this light, but it’s the feel of the light and not so much the light itself that’s important. The thing I like most about this light is that it emits a light quality that is crisp, but not too crisp. I have a similar sized fresnel Mole Richardson hot light, about the same size, but the light it emits is way crisper than the Norman, too crisp. The Big 10” emits a light sort of like a baby bear’s bed, not too soft and not too hard. Here I go again, but to keep on subject, I’ll have to promise to post more about my favorite light at another time. Let’s just say it casts a relatively crisp shadow.

Norman 10″ fresnel spot light.
Small light boxes tend to emit a similar quality light as does my big 10”, but not quite as crisp and for some reason a bit less controllable. I tend to use small boxes when I don’t want a “cast shadow” quite as crisp as my big 10”, but I want a gentler “shadow” than my big 10 would create.
Side note:
Some food photographers prefer to use some type of diffusion material stretched over a wooden frame to create a “light panel” (my name for it), which basically serves to enlarge the original light source much the same way a light box does. Making a light panel is cheaper than buying a light box and it also has the advantage of allowing the photographer to graduate the light coming through the panel. In a light box, the light is pretty much equidistant from the front of the box, creating a very even light output. All the corners of the box are equally bright. With a light panel, you can manipulate the light and make one area of the light box brighter than another, causing a graduated effect in the light output and in any reflections of the light panel that might occur on the subject. This can come in REALLY handy to a creative photographer. Maybe I’ll write a post of making and using this light source for food photography
Why small light sources create more texture
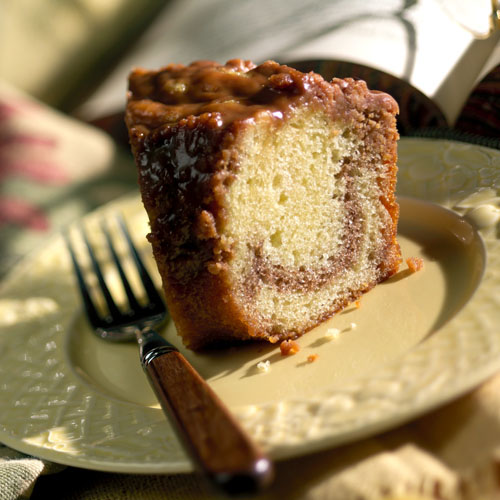
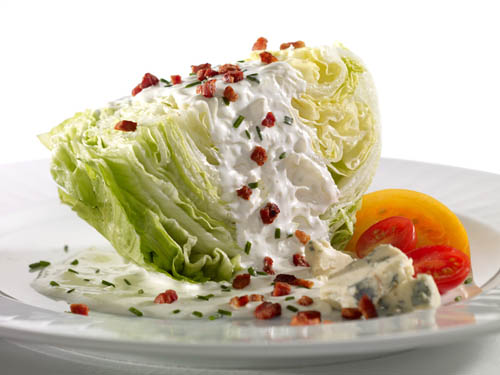
I mentioned that there are two types of shadows, the shadow across the subject where it transitions from light to dark, and the second type of shadows are cast shadows. It’s the transition shadow that is the one that creates texture in your food photography. When you break it down, texture is nothing but light and dark, right next to each other. Find something that you consider to have lots of texture and stick your eye really close to it. (You may not want to do this in public :o) What gives you the impression of texture is the lightness (lit side) next to the blackness (shadow side). And the faster that transition between lit and unlit happens, the more perceived texture there is… That is why a small light source creates the impression of more texture. The transition between light and shadow happens more rapidly with a small light source than with a large light source.
You just can’t get texture like this from light sources such as large light boxes
Scraping Light
So far I’ve talked about the fact that the light source size has an influence on texture, but to tell you the truth, what’s more important in creating texture in your food photography is the placement of the light source. I call it “Scraping Light”. The idea is that you want to scrape the light across as many surfaces of the subject as possible.
If you would think of the food photography set as being a clock with the camera being placed at 6:00, 9 times out of 10, I place my light at ABOUT either 10:00 or 2:00, depending on what the shape of the particular food item I’m shooting and how it is placed on the set. Usually, lighting for shape trumps (is more important than) texture, so I choose the placement of the main light in order to emphasize the shape of the food. After creating as much shape as possible, I work on the texture. Usually, shape is emphasized by selecting the overall direction of the main light (left side / right side) and texture is emphasized the precise placement of the light. Sometimes moving the light just an inch or two can make all the difference in the world, as far as texture is concerned. (See example photos)
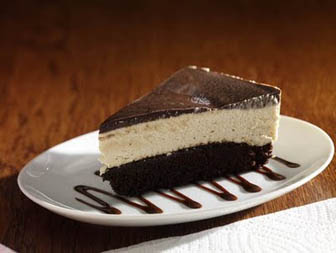
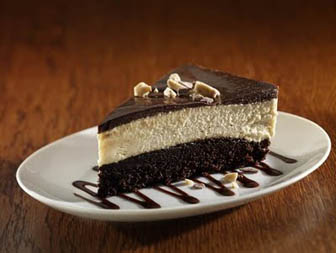
Here’s a really good example of “Scraping Light”. The Main light was moved just a few inches and see what a difference it made?
Light placement on the vertical axis
In the paragraph above, I talked about placing the main light at 2:00 or 10:00 on the clock dial, but so far, I’ve only talked about the horizontal axis of light placement. This is a subject that most photographers take for granted. They tend to place their main light at the height that their favorite light stand unfolds. The fact is, in my opinion anyway, that most food photographers place their main light too high in reference to their set. Placing the main light too high, does three things that hurt most food photos.
1. By placing the main light too high, they do not get the texture possible from scraping the light across any subject’s horizontal surfaces and with a lot of food shoots, this is a lot of surface not to maximize the texture of. To me, that’s a wasted opportunity to create dimension in your food photography
2. An overly high main light placement creates shorter cast shadows. Most food photographers, especially newer ones, think that the shorter the cast shadow the better. To an extent this might be somewhat true, but not usually. People usually don’t like to see cast shadows, especially crisp cast shadows. The longer the crisp cast shadow, the more objectionable they become, or at least that’s what most people think. I’ve discovered an exception to this that most food photographers have not. If you make the cast shadow sooooooo long that it extends out of the frame, then most viewers just accept it. Maybe that’s why I do not prefer to shoot from high angles though. This lighting technique works best with low angle photos.
3. When the main light is too high, it tends to make the table surface and the plate, especially if it’s white, way too bright. I don’t know if you know this or not, but the eye tends to go to the brightest object in the photograph. If the brightest thing by far in the photo is the tablecloth or the white plate, then it tends to detracts from the food.
How’s this for texture?
By keeping my main light as low as possible, I accomplish three goals. I create more texture on horizontal surfaces, my cast shadows usually extend out of the crop of the photo, making them less objectionable to most viewers, and it keeps the plate from becoming too bright.
After light source size and light placement, the other main thing that can affect texture is the amount of fill light. The more light that fills in the main light will affect the contrast between light and dark, and therefore texture. The thing about fill light though is that the amount of fill added is usually adjusted for other reasons besides creating texture. Food photographers usually use fill light to adjust the mood of the photo, and that usually trumps texture in most photos.
Yet another side note:
Food Photography, on one level, is really an art.
When you’re a novice food photographer, you just hope to turn on your lights and get an acceptable image. As you improve you begin to understand that there are things you can do as the food photographer to create subtle differences in the photo. And then, after awhile, you’ll want to use those tools and techniques you’re learned to communicate with the viewer of your photography. It’s not necessarily that you’re making the photo “better” with these tools and techniques, it’s that you’re actually making a “statement” with the photo. Not a political statement or anything profound, it’s just that you have the control to make some area of the photo light or dark, textured or not textured, and whatever you decide to do is a “statement” of sorts. You can create a mood, a feeling of your choice. That’s what I mean by statement. You make choices about the photo and that means you’re making a statement. Now, you’re making art… :o)
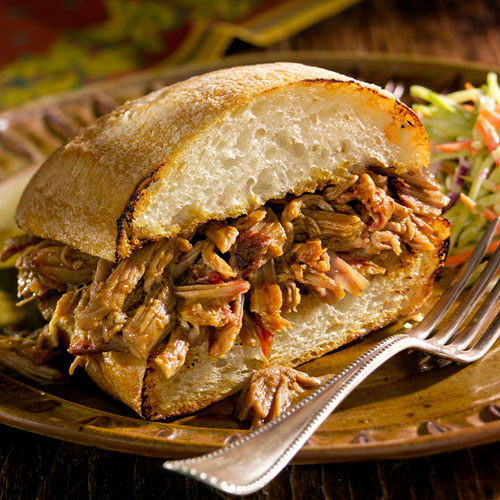
Pretty nice texture on this sandwich and you really don’t notice to shadow too much…
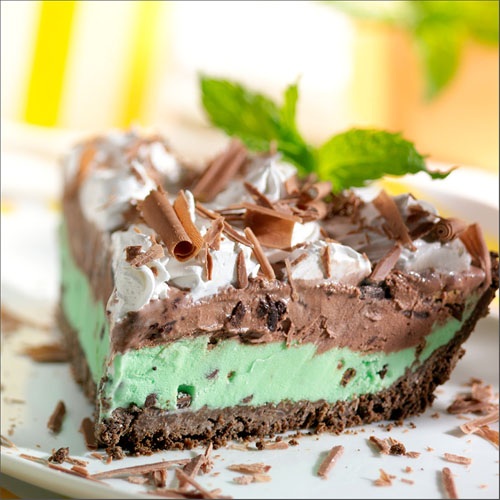
I love the way light scrapes across the edge of this ice cream pie…
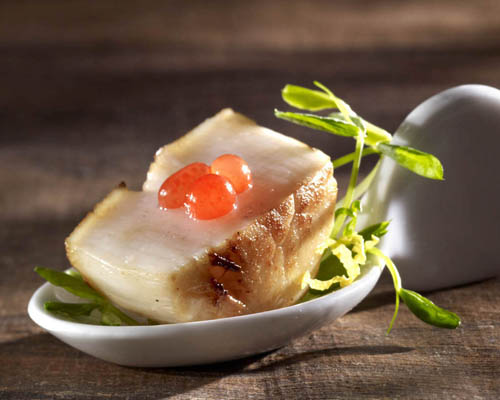
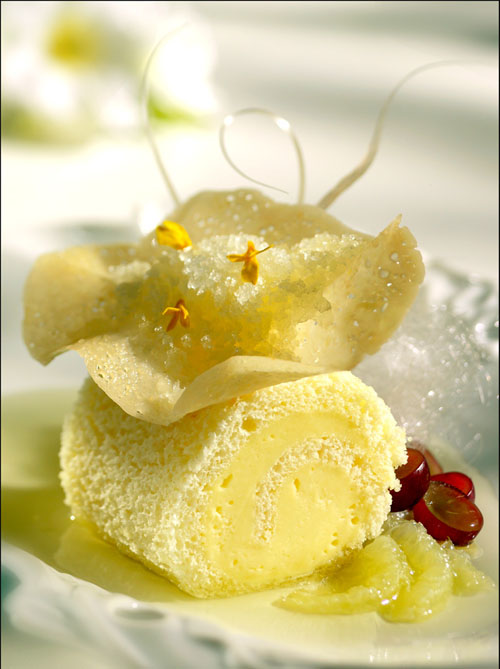
It’s tough to get texture on small objects if you use large light sources, and to a scallop, anything is large…
Here’s a good example of how the cast shadow can extend out of the crop and no one really notices it…

Back lighting has the added benefit of showing off steam.

Here’s a pretty harsh shadow, but since it runs off the edge of the picture, you just don’t notice.
Conclusion on Lighting for Food Photography – Texture
I really meant to talk about other related issues in creating texture with food photography lighting, but I’m going a bit long on this post, so I’ll get into this more on next week’s post. So have a great week and keep shooting. Experiment with your food photography lighting and don’t be afraid to fail a few times. You learn more from pushing the envelope and failing than you do by playing it safe and doing the same old thing, even though it works. You have to ask yourself if you want to keep creating “okay” photos or learn how to create “ART”.
Again… I apologize for any spelling and grammar errors that my appear here. I’m pretty sure that Mrs, Moses, the third grade English teacher, rolls over in her grave every time I get near a keyboard… Feel free to email me with corrections. :o)
Hey! If you like what you’ve seen here and want to see more, please sign up for my email list below.


Great follow up on your last lighting post. Thanks for sharing, very insightful.
Very nice article with good example and wonderful food photos. I’m really curious about Fresnel light in food photography I never used and I would like to try it.
Usually I use a big octabox and, combined, a flash with honeybee 30′ to have the contrast and definition (texture).
Thanks a lot Mr. Michael. Great article, Great food shots. It helps me lot.
Thanks!
That’s a really useful article, thanks for the info
However I wanted to ask; have you tried fresnel continuous lights for food photography? also what’s the difference between leds fresnel lights like the Aputure 300D and the HMI like Arris in terms of quality of light when combined with a fresnel lens?
Also I would greatly appreciate some feedback on my work:
https://www.mohamedabdulhady.com/index.php/foodphotography/
Sorry for the extremely slow reply… Believe it or not, I just saw this. I’ve been considering switching to LED for food I actually own a 300D that I use for people video shooting. I think it would work perfectly!