
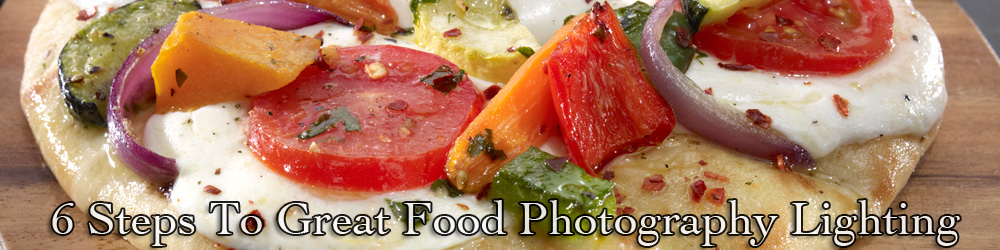
6 Steps To Great Food Photography Lighting
To me, lighting is probably THE most important aspect of food photography. I used to have a stylist that once told me that I “could make a turd on a paper plate, look great”. Thank God we never had to test his theory, but it was quite a compliment that I have never forgotten. I do believe that the ability to properly light food is one of my greatest gifts, besides my amazing good looks and endless modesty, that is… But seriously, each photographer is born with a set of gifts, and I believe mine is lighting. I don’t have a great eye, or special skills for handling clients. I’m not really good with colors or composition, but I seem to understand light pretty well. And luckily for me, I usually work with a team of professionals that are really great with the things that I am weak at. It works out pretty well… Whether it’s capturing the essence of a dish or setting up the perfect ambiance, lighting truly becomes the cornerstone of my art, much like the meticulous curation of gift hampers perth for a special occasion.
I’ve given the matter a lot of thought and I’ve come up with a list of six things that I try to do with each and every food photo I take, and here they are.
1. Compose, then light.
The biggest suggestion I have here for you today is to always “compose, then light”. What this means is that it’s better to finalize the composition before you start playing with the lights. If you’re like me, you’ll try to light the subject so as to show off the shape and texture of the food. Well, if you don’t know exactly which way the food is going to be positioned, then it’s really hard to light for something that hasn’t been determined yet.
I usually place my main light to give me the best possible texture and shape on the main food element of the shot. If we’re selling steaks, then I make sure that the main light is positioned so that steak looks as good as possible, and how that steak is situated on that plate makes all the difference. There have been many a time when the client decided at the last minute, to spin the plate five degrees. This causes me to have to move the main light from this side to that side, and along with it, a couple mirrors other lights too.
2. Turn off the ambient light while you’re lighting the set.
It’s tough to see what your lights are doing if the other lights in the room is too bright. I usually shoot strobe, so my flash will overpower the ambient light. There’s no problem with exposure or color, it’s just that I can’t see what my light is doing to the subject. Sure, I can take a test photo and see the shot on the monitor, but it’s much easier to try to figure things out by looking at what the modeling lights are doing instead of just guessing and shooting. Sure, there will be times when we can’t just turn off all the lights, especially on location, but if you can, I suggest that you do.
3. Add one light at a time.
I very seldom use just one light, so I always start with the main light and then add one light at a time. If I don’t do this, then it’s hard to determine which light is doing what to the subject.
BTW – When you’re doing the first shot of the day, it’s easy to remember to add one light at a time. But when you’re on to the second and third shot, or if you’re lazy or in a hurry, it’s really easy just to put the next plate in and try to piggyback on the last lighting setup. If you’re going for production, then you might be okay with this practice, but if you’re going for the best possible photo, then it’s usually a mistake. It’s usually best to add on light at a time, for each individual shot.
This is the order in which I like to add my lights. The names I’m giving the lights are what I call them, and may not match what others call them, so I’ll try to describe them to you.
Main – Always place the main light first. The main light gives you shape and the placement of this light is the most important decision you will make regarding the lighting of each shot. This light usually is placed at around 2:00 or 10:00 on the dial, if the camera is at 6:00. I said AROUND! Moving this light even an inch sometimes, will make a huge difference.
As I add a light and move on to placing the next one, I will usually keep the “flash” turned on but I will turn off the modeling light. I do that for every light, except the main light. That modeling lamp of the main light always stays on. The only exception to this is when the stylist is working on the set and needs to see to do detailed work. Then, of course I turn on all the modeling lights so she can make the food look beautiful.
3/4 Rear Edge – This is usually a mirror or a small box placed at 10:00 or 2:00, on the shadow site of the set. It doesn’t always have to be very bright, when compared to the main light, but it’s usually a good idea to so that it can help separate the subject from the background. It sort of works like a hair light, in portrait photography.
Glare – At least try to use a glare light. It usually makes a huge difference and is always worth trying. There are occasions where the glare light just doesn’t work, but that’s about 30% of the time. More often than not, it makes a really big difference in the final food photo. I have to admit, I will sometimes forget this light, especially if I’m in a huge hurry, and I usually regret it later.
Fill – I usually use two fill lights. I have one over the set, almost over my camera, and another behind my camera. These are the last lights I use and there are times I need fill and times I don’t.
New clients are sometimes a little worried by the way I light things. By waiting until the very end to add the fill, the shoot usually doesn’t look complete until the very last moment, so the client is always looking at very dark photos on the monitor. But offI would add the fill earlier, then I can’t see what the other lights are doing.
4. At least consider (try) a glare light and a 3/4 rear edge light.
There will be times when you think to yourself that either of these two lights just won’t work on a particular shot, but I strongly suggest that you try them both anyway. You’ll not only be surprised that one of both will work nicely, but might actually be the thing that “makes” the photo “special”. So much of food photography lighting is about finding and exploiting that little “something special”, and I’m here to tell you that these two light are often the “something special” that lands the photo in my portfolio.
5. Bracket the fill light.
Hindsight is always 20-20, so I’m a big believer in covering our butt whenever I can. Have you ever taken a shot, looked at it, liked it, and then gone to the bathroom only to return and discover that you didn’t like it all that much after all? It happens to me all the time (I have a small bladder). On thing that I like to do is shoot the same shot with different amounts of fill light. That gives me options, and later when I decide that my original shoot looked either a little too moody, or a little to flat. I have it covered.
6. Look at your histogram
This will answer the question “Am I properly underexposed?” With all the adjustments possible with Photoshop, this isn’t a really big deal, but it’s usually a good habit to get into anyway. I once did a shoot on location, using a new laptop I wasn’t used to, and I came back to the studio only to realize that all my photos were a bit underexposed. They were still fine and looked great in the end, but they needed a little work. Live and learn.
Well, that’s it, my six steps to great food photography lighting. If you have ANY questions or comments, please leave them in the comment fields below. I’m here to help you guys out, so if there is anything in particular you want to know about food photography, I’d be willing to help if I can.
Thanks!
MR
Other Related Pages
- How To Shoot Great Pizza Photography
- Food Photography Critique of Parfait
- Bread Food Photo
- Strawberries Dipped in Chocolate
- Nine Things That Make a Food Photo Look Natural
- Sexy Food Photography Lighting Technique
- Three Ways Food Photographers “blow out the background”
- The Ultimate Food Photography Lighting Resource
- Yogurt Food Photography Critique and Behind the Scenes
- In food photography, how do you make shadows disappear? Q&A


Hi Ray. Thanks for another great article. Learned a lot. Could you please help me visualize a 3/4 edge rear light and a glare light by using a lighting diagram? I need to understand what these two lights should achieve. I hope I’m not asking too much. Best regards.
I’ll do that in a future post, okay?
Hi Michael,
I have followed your website for a few years as my main go-to place to get help with food photography.
Now I am hired by a local lifestyle magazine to illustrate articles written by a local chef, so I am even a more serious student of your websites.
I’ve never heard the term “glare light” before. Can you explain that that is?
(BTW, I’m one class away from graduating with a BS from the Art Institute of Pittsburgh, online division.)
Thanks…